
Theatre of Blood Guide
Introduction
Welcome to RuneRealm’s Theatre of Blood raid guide! In this guide you will learn about Theatre of Blood (ToB) minigame. RuneRealm is a bit different when it comes to creating a raid team compared to OSRS’s custom team building system. In RuneRealm you have two options to start the raid, first is by doing a “Quick-Solo” which will let you be able to instantly start a raid by yourself and the second is by creating a clan chat and having your teammates join so that you can start a team raid. You will face different challenges and you must get the absolute best you of yourself, your gear, and if you are playing with a team out of your teammates to beat this minigame. A small mistake could ruin your attempt in the blink of an eye. But… with high risk, comes high rewards. ToB offers one of the best unique drop tables, containing some of the best pieces of loot in the game.
RuneRealm’s ToB has a unique feature where you can choose which and how many of the 5 mini bosses which are the Maiden of Sugadinti, Pestilent Bloat, Nylocas Vasilias, Sotetseg, and Xarpus you want to kill before killing the final boss Verzik Vitur. You must kill at least 1 boss before killing Verzik Vitur.
Each boss fight has unique mechanics and requires different strategies. In this guide I will take you through what you need to make an attempt at ToB, which boss you have to fight, what mechanics you have to take into account, and of course what rewards could be waiting for you in the end! Let’s open the curtains…
Requirements
As stated above, ToB is considered one of the hardest challenges in the game, thus having one of the highest requirements. I will post a minimum setup and a recommended setup. The less items you have from the recommended setup, the lower the chance you will beat ToB, unless you are very experienced. Even with the best gear, inexperienced players can have a hard time beating ToB.
Skill Requirements
Attack, Strength, Defence, Hitpoints, Ranged: 99
Magic: 94+
Prayer: 80+
While beating ToB would perhaps be possible with lower stats, I would not recommend it unless you are up for an even bigger challenge.
Gear and Inventory Requirements
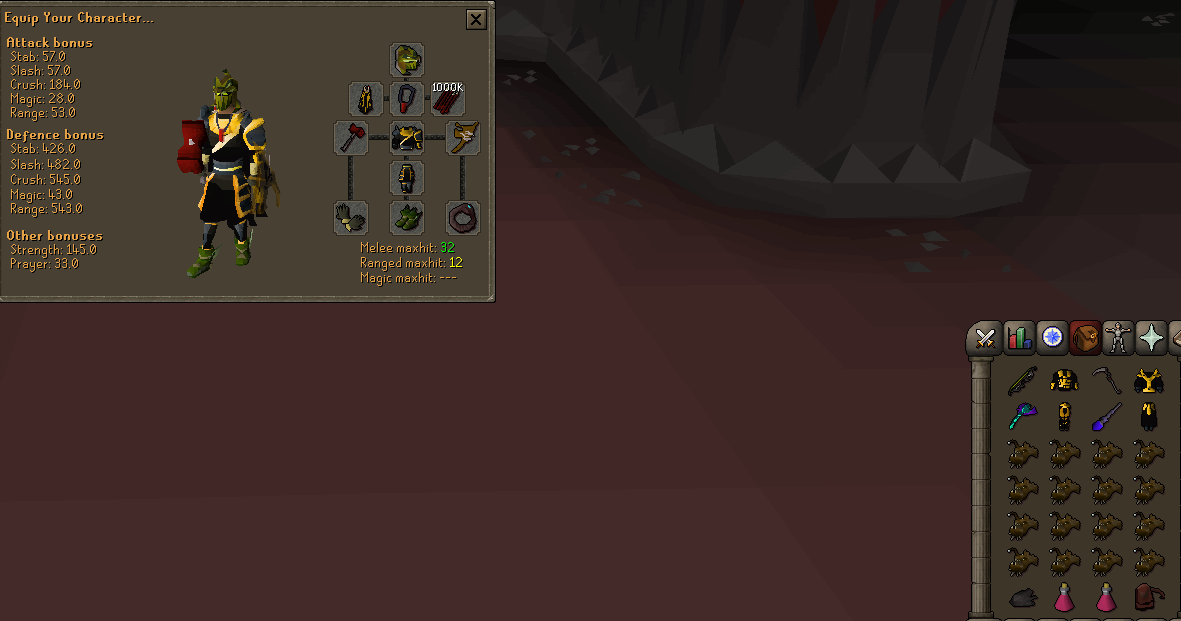
BIS

Helm: Supreme Helm
Necklace: Amulet of Blood Fury
Chest and Legs: Vesta's Chainbody and Plateskirt (T5) - Bring Zuriel's Robe Top and Bottom, and Morrigan's Body and Chaps for respective magic and ranged gear swaps.
Boots: New Balance - (Made by combining 1x Guardian, 3x Primordial, 3x Pegasian, 3x Eternal boots, and 15,000 upgrade tokens.)
Gloves - Supreme Gloves - (Made by combining 1x Ferocious gloves, 1x Zaryte vambraces, 1x Tormented bracelet (or), and 15,000 upgrade tokens.)
Ring: Commander Ring (i) - (Made by combining 1x Commander ring, 1x Lucky ring (i), and 5,000 upgrade tokens.)
Cape: Prestige Master Cape (not shown in picture)
Weapon/Shield: Dragon Warhammer (+) and Shattered Spirit Shield/Avernic Defender - Bring a Scythe of Vitur, Twisted Bow, Toxic Blowpipe and Harmonised Nightmare Staff. (BGS is a good alternative for Dragon Warhammer (+) and my personal preference as you don't need to bring a shield slot item.)
Ammo: Dragon Arrows
Inventory
- 8x above stated gear items
- Rune Pouch (Filled with Blood, Soul and Death runes) - If you have a Prestige Master Cape, you get free unlimited elemental runes, thus allowing you to cast both Blood and Ice Barrage.
- Ominous Heart
- 1x Damage boost pot (2)
- Fill the rest with your inventory with Anglerfish.
Recommended
Helm: Serpentine Helm - can be swapped with a Magma Helm. Being able to venom bosses adds quite some DPS, giving you a strong advantage. I wouldn't recommend any other Helm. Make sure it is has enough charges before you go inside.
Necklace: Amulet of Blood Fury - This amulet has a chance to heal you for 30% of the melee damage you've dealt. This effect gives a huge advantage. Up to this point, this item only drops in ToB itself so there will be a small amount in game. You can swap this item for an Amulet of Torture, Necklace of Anguish, or a normal Amulet of Fury (depending on what combat style you use most often).
Chest and Legs: Vesta's Chainbody and Plateskirt (T5) - Bring Zuriel's Robe Top and Bottom, and Morrigan's Body and Chaps for respective magic and ranged gear swaps.
Boots: Pegasian Boots - Can be swapped for Primordial Boots.
Gloves - Barrows Gloves - These gloves are the best option for ranged, and the second best for melee and mage, thus being the best hybrid choice.
Ring: Commander Ring - Also has the best hybrid stats. Brimstone Ring has the second best hybrid stats. A Ring of Suffering (ri) is a strong alternative, due to its high defence stats and recoil damage helps some on Nylos. You may opt for a Ring of Wealth (i) instead (or bring in inventory and swap to it during the last phase of the final boss) for the additional 5% drop rate, which will affect points/drop chance at the end of the raid.
Cape: Prestige Master Cape - This cape gives you the best stats overall and provides you with all of the bonuses of all skill capes, trimmed and mastery skill capes. A lot of these perks are good for PVMing, such as reduced prayer draining, increased damage and accuracy in certain combat areas. If you don't have one, a Prestiger Cape, or skill Mastery Cape could be used as well.
Weapon/Shield: Dragon Warhammer and Arcane Spirit shield - Bring a Scythe of Vitur, Twisted Bow, Toxic Blowpipe and Kodai Wand (or Harmonised Nightmare Staff) as well. Arcane Spirit shield could be swapped with any other spirit shield, or even a defender. It is not a hard requirement to bring a shield slot item. If you have no Twisted Bow, I recommend bringing an Armadyl Crossbow. While blowpipe offers the best DPS in many situations, Twisted Bow is recommended for certain fights, that's why I recommend to bring an alternative. Don't forget to charge your Blowpipe before entering.
Ammo: Dragon Arrows - If bringing a crossbow, I advise bringing Onyx Bolts (e).
Inventory
- 8x above stated gear items
- Rune Pouch (Filled with Blood, Soul and Death runes) - If you have a Prestige Master Cape, you get free unlimited elemental runes, thus allowing you to cast both Blood and Ice Barrage. Kodai Wand will also provide unlimited water runes. If you do not have a Prestige Master Cape or Kodai Wand, swap the soul runes for water runes. This way you can still Ice Barrage (which is very highly recommended and still use Blood Blitz if healing is required).
- Ominous Heart - Combines the effects of Ferocious, Twisted and Imbued Hearts. If you don't have this, just bring a Ferocious and Twisted Heart. If you don't have any of these, bring Divine Super Combat and Ranging potions. I don't recommend the latter.
- 2x Super restore potion
- Fill the rest with your inventory with Anglerfish (you can bring Manta Rays, Dark Crabs, Sea Turtles, or Sharks if you have Prestige Master Cape, because it allows you to overheal with any food like Anglerfish) You can also bring a few Karambwans for tick/combo eating. You can also bring Saradomin Brews, although this would also require you to bring more Super Restore potions, this makes the total amount of healing you can do not much more than with an inventory filled with food, so I don't necessarily recommend this.
Minimum Gear Setup
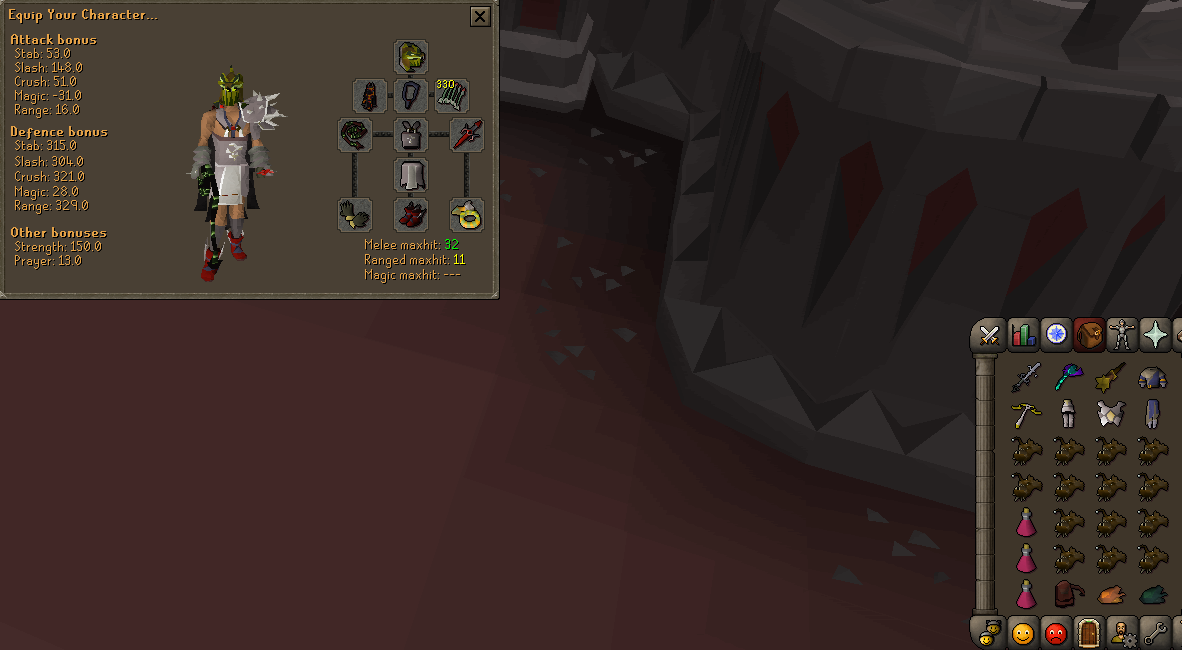
Helm: Serpentine Helm - Can be swapped with a Magma helm. I don't advise bringing anything less.
Necklace - Amulet of Fury
Chest and Legs: Bandos Chestplate/Tassets (i) or Vesta's Chainbody/Plateskirt (T3) - Bring Morrigan's Body/Chaps (T3) or Armadyl Chestplate/Chainskirt (i) and Zuriel's Robe Top/Bottom (T3) or Ancestral Robe Top/Bottom.
Boots: Primordial boots - Can be swapped out for Pegasian Boots.
Gloves: Barrows Gloves
Ring: Berserker Ring (i) or Archers Ring (i)
Cape: Infernal/Fire Max Cape, or Accumulator/Assembler Max Cape
Weapon/Shield: Serpentine/Divine/Lucified Whip with Avernic/Dragon Defender - Bring a Toxic Blowpipe, (Toxic) Staff of the Dead/Master Wand, and the best crossbow you have, either Armadyl, Dragon Hunter, or Dragon Crossbow. If you don't have a Rune Pouch you could bring a staff with a built in spell, such as Trident or Sanguinesti Staff, but I absolutely do not recommend this. A Bandos Godsword or Statius's Warhammer can be brought for their special attacks to reduce defence on certain bosses.
Ammo: The best bolts you have, at least Diamond Bolts (e), Ruby Bolts (e), or Dragonstone Bolts (e).
Minimum Inventory Setup
- 8x above stated gear items
- Rune Pouch (filled with Death, Blood and Water runes) - This way you can cast both Ice Barrage and Blood Blitz, both freezing and healing is very handy. If you don't have a Rune Pouch, bring any of above stated powered staffs. Again I do not recommend this. You need mage attacks at certain bosses, but freezes, despite giving a huge advantage, same as blood spells healing, are not absolute requirement.
- 3x Super Restore/Prayer potions
- Fill your free slots with the best food you have. Saradomin Brews can be brought, but require you to bring (more) Super Restore potions, and usually, if being damaged, you need big healing in a short time to prevent dying. I don't recommend this.
Other Requirements
Pet Effects (in order from highest to lowest recommended)
- Master Alex/Mini Alex - The occasional healing will help you a lot! I highly recommend having this pet effect active at all times.
- Second pet effect (Extreme Donator+) Culinaromancer pet effect - The 10% extra accuracy in all combat forms is a nice advantage to have.
- Third pet effect (Elite Sponsor+) Pet Walkchaos effect - While this is the least necessary of all 3, a 15% magic boost is a nice addition to have.
Prestige Abilities
- Berzerker - Boosts melee accuracy and strength by 10%
- Scavenger - Chance to drink your last dose of potion without finishing it
- Lucky Luke - Rare drop rates are reduced by 5%
- Fidelity - You are 10% more likely to attract a pet follower
Before Entering the Theatre
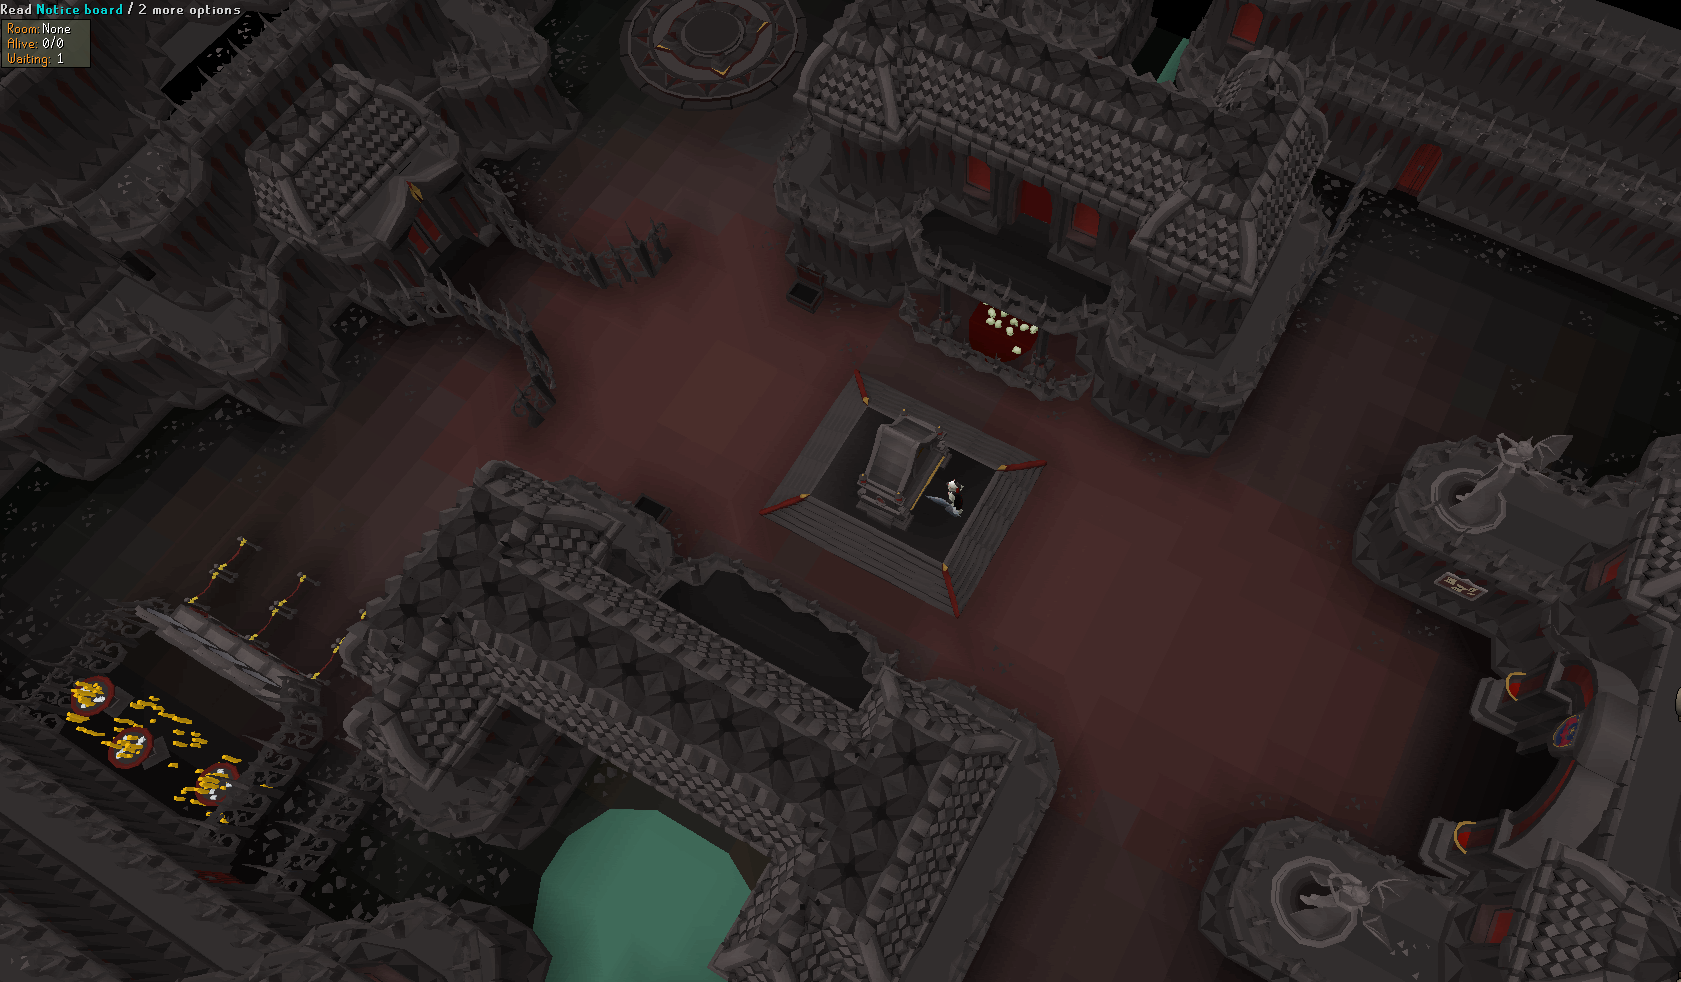
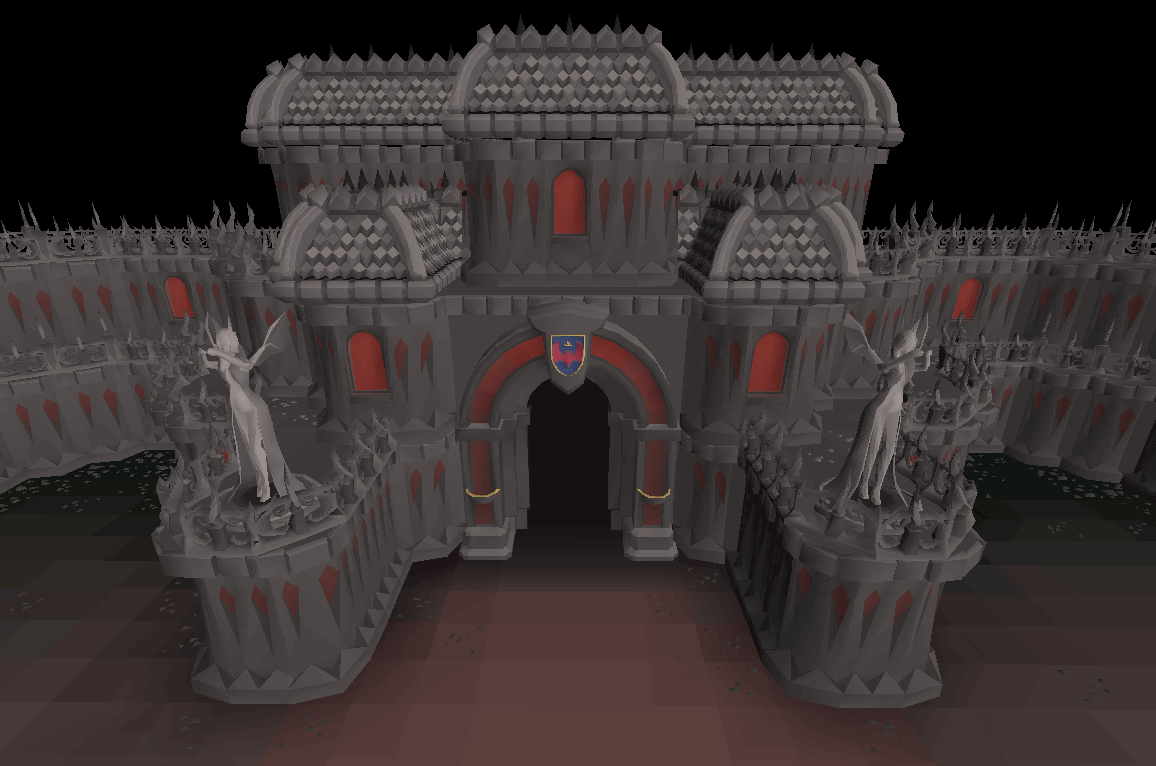
You can teleport straight to ToB through the minigames teleport menu in the spell book or by typing ::tob in chat. When you teleport here you will be in the waiting lobby. On the west side of this area is a bank and the exit of the Theatre, should you be misbehaving... In the middle of this area is a notice board. If you read this you can see if there is already a raid going on in your cc and how many players are in the lobby. On the east side is the entrance to the Theatre.
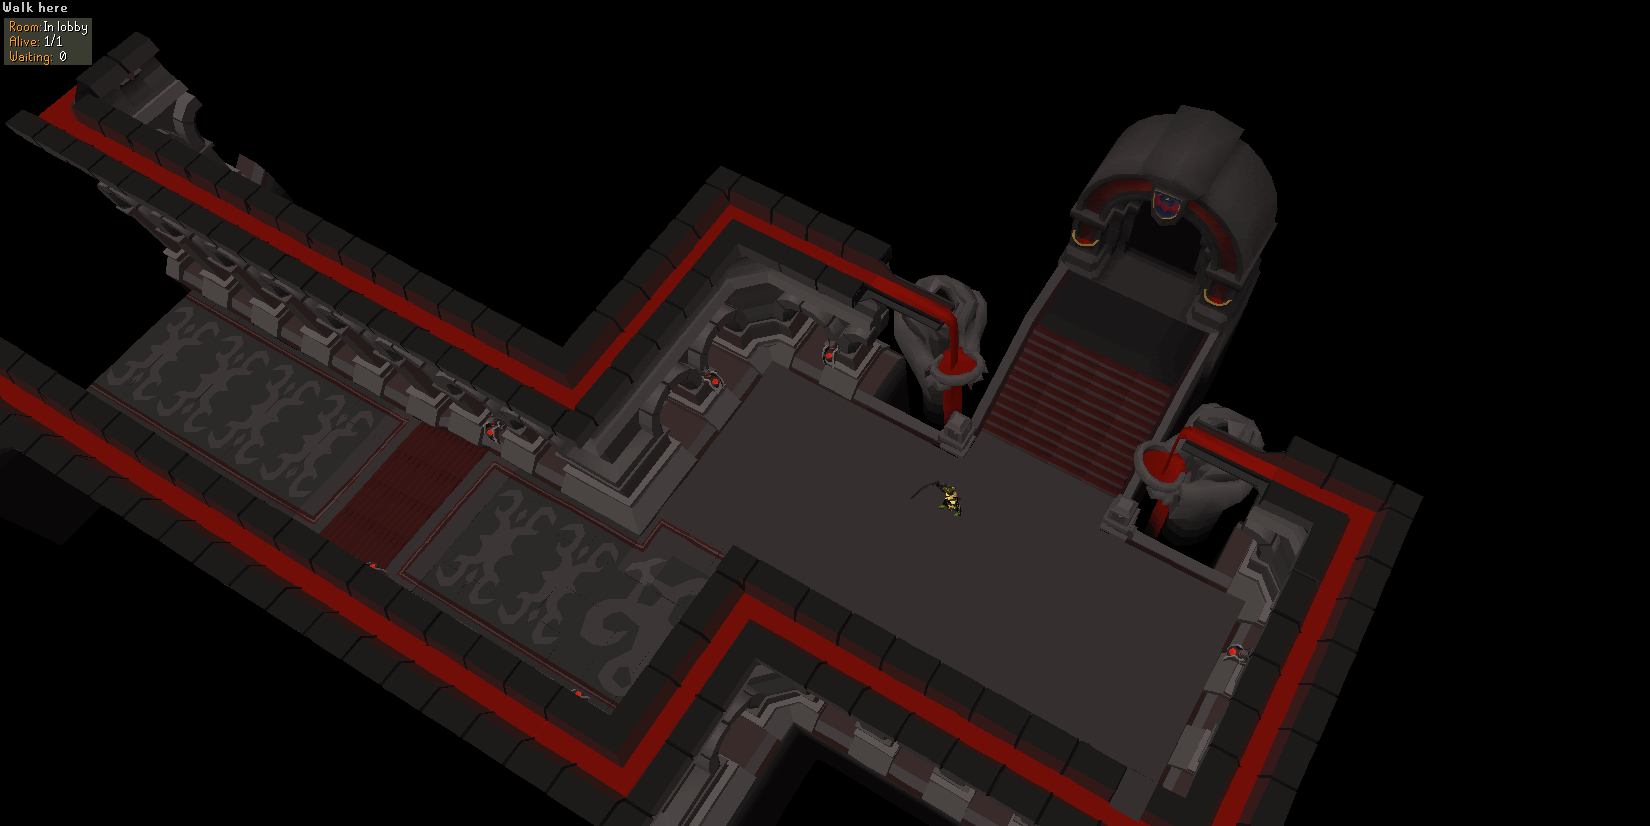
If a HCIM dies inside ToB, their Hardcore status is revoked. If you die inside while playing solo the raid is over and you are out. If you die when playing with a group you get assigned a spectator spot where you can watch your friends beat the boss. You can select different spectator spots in the player panel interface on the bottom right. If the boss has been defeated, dead players come back to life and can re-join for the next boss. Everyone is healed back to max HP, and prayer will be restored as well. If everyone in the group dies, the raid is over. You can teleport out of ToB, a message will pop-up to confirm your teleportation. If you log out in ToB, your progress is not saved and you will find yourself outside of the raid when logging back in. Bosses scale with the amount of players that are inside the raid. The bosses will have higher points/HP and in some cases deal more damage as well. Some abilities also scale up with the amount of players inside. This will be explained with each boss ability. When in the lobby inside ToB, on the top left can see which room you're in, how many players are in and alive, and how many there are waiting outside. If you start the raid, this overlay changes to your points, total group points, and players alive, and a large health bar for the boss will show on top of the screen.
For each monster killed you will get points. These points are shown in the top left corner. You will also see team points. This is the total points of all players in the team. This could be used as a benchmark, how is your performance based on your points and the total points earned? Generally speaking, the more damage you deal, the more points you get. Some bosses have healing mechanics, in this case, you will get penalized for the healing done. You won't get more points if you let a boss heal up extra on purpose, so you can deal more damage. If you die within a raid but the group survives, you can proceed playing, but your current total points will be halved. You will also receive a small amount of points which can be used later in a supply chest. You can only see these points in this supply chest.
Entry Mode
One good way to practice ToB is to attempt the much more forgiving Entry Mode which you can enable by speaking to the Mysterious Stranger outside the entrance. This mode offers most of the same experience however all NPCs have had their HP, max hits, and levels reduced. Your team gets up to 3 lives, dying will reset you to the beginning of the room where you died. Unfortunately with lower difficulty comes a lower chance at rare drops, and in addition to lowered chances Entry Mode will not be able to roll the most valuable items including Scythe of Vitur, Nightmare Staff, Harmonised/Volatile/Eldritch Orbs, and Blood Shard. Pet drops from bosses are also disabled. Despite this it can be a good tool for helping you prepare for normal mode, and some great loot is still available! Point cap differences will be detailed in the last section of this guide.
The first boss: The Maiden of Sugadinti
Base Hitpoints: 2500
Immune to poison/venom: No
Best style to kill: Ranged with Twisted Bow or melee with Scythe of Vitur. While Scythe would deal more damage, ranged makes you more versatile and mobile which can be preferable for some players.

Abilities:
Tornado: This is her generic magic attack, this will always target the player closest to her (stat drain effects from OSRS are not implemented).
Blood pools: Maiden will occasionally throw blood pools to all players in the room. These blood pools deal heavy damage, reduce your prayer swiftly and heal the boss for the damage done to you! You should move immediately when she does this attack. All players in the raid will be targeted each time.
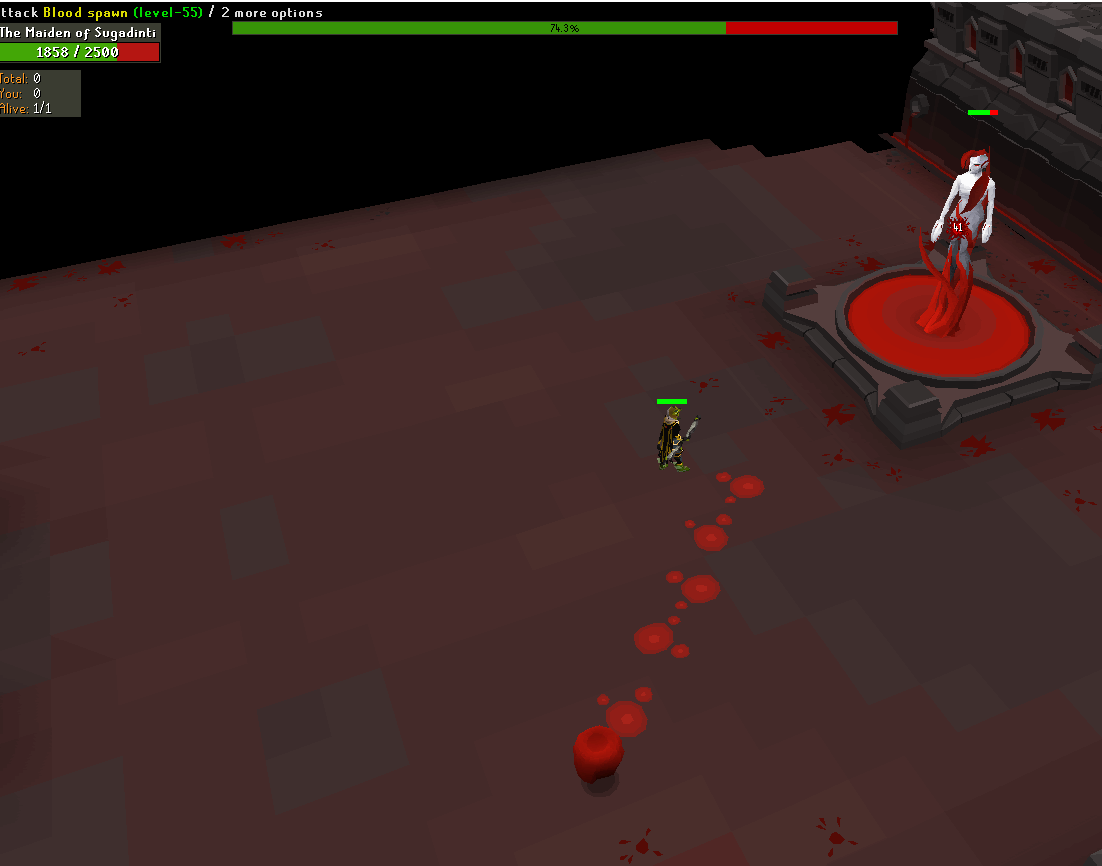
Blood spawn: There is a chance a blood spawn will spawn on the blood pools. These blood spawns are red blood balls that bounce around the room leaving a trail of blood pools. Kill these as quick as possible to prevent the whole room being filled with blood pools. Freezing them with magic spells could help you a lot. The more players inside the raid, the more blood spawns can spawn in the raid. Some groups prefer to ignore blood spawns in favor of killing Maiden faster.
Nylocas spawns: At 70%, 50%, and 30% hitpoints the Maiden will spawn 2 Nylocas per player on the east side of the room that will walk towards her, if they reach the Maiden they will heal her by the amount of hitpoints these Nylos have left and increase Maiden's max hit. 2 Nylos will spawn per player in the raid. The Nylos have 300 HP, but the more players inside, the more HP they have. They should be frozen and killed ASAP after spawning.

Fight Overview
Despite the Maiden having a lot of heavy damage dealing abilities, she is one of the easiest bosses. You can kill her with taking close to 0 damage when paying enough attention. When you enter her room, you can find her in the back of the room. Despite her being 'stuck' in place, her attacks will reach you in the whole room. Use the Dragon Warhammer, Statius's Warhammer, or Bandos Godsword to bring her defence down, then start ranging or meleeing her. Move a few tiles when she throws blood pools at you. When she's at 70% HP, the Nylos will spawn. You can freeze them individually, then kill them one by one with the blowpipe. You can also wait a bit until they are grouped together in front of the boss, then freeze them both at once, but this is a bit more risky as you have less time to kill and chances to (re)freeze, but if successful, you can kill them both at once with Barrage spells. Do not stress if you fail to kill them, Maiden will heal the amount of hp they had left, but she won't spawn any new Nylos until 50% and 30% HP. Proceed with the fight, rinse and repeat until she is dead.
The second boss: Pestilent Bloat
Base Hitpoints: 2000
Immune to poison/venom: No
Best style to kill: Melee
Abilities
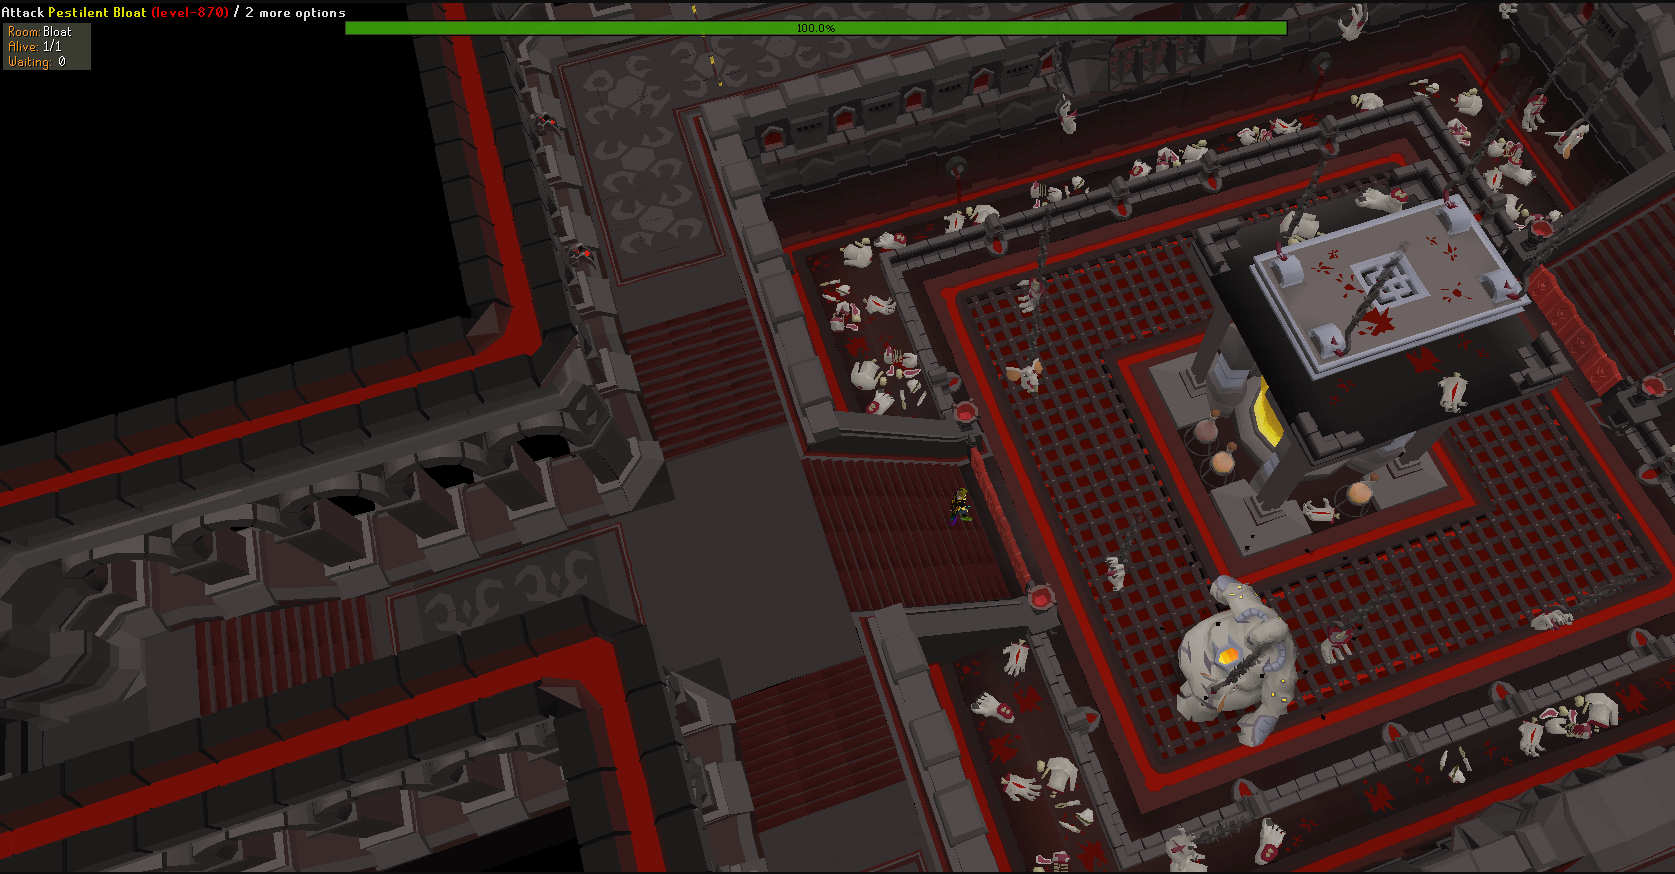
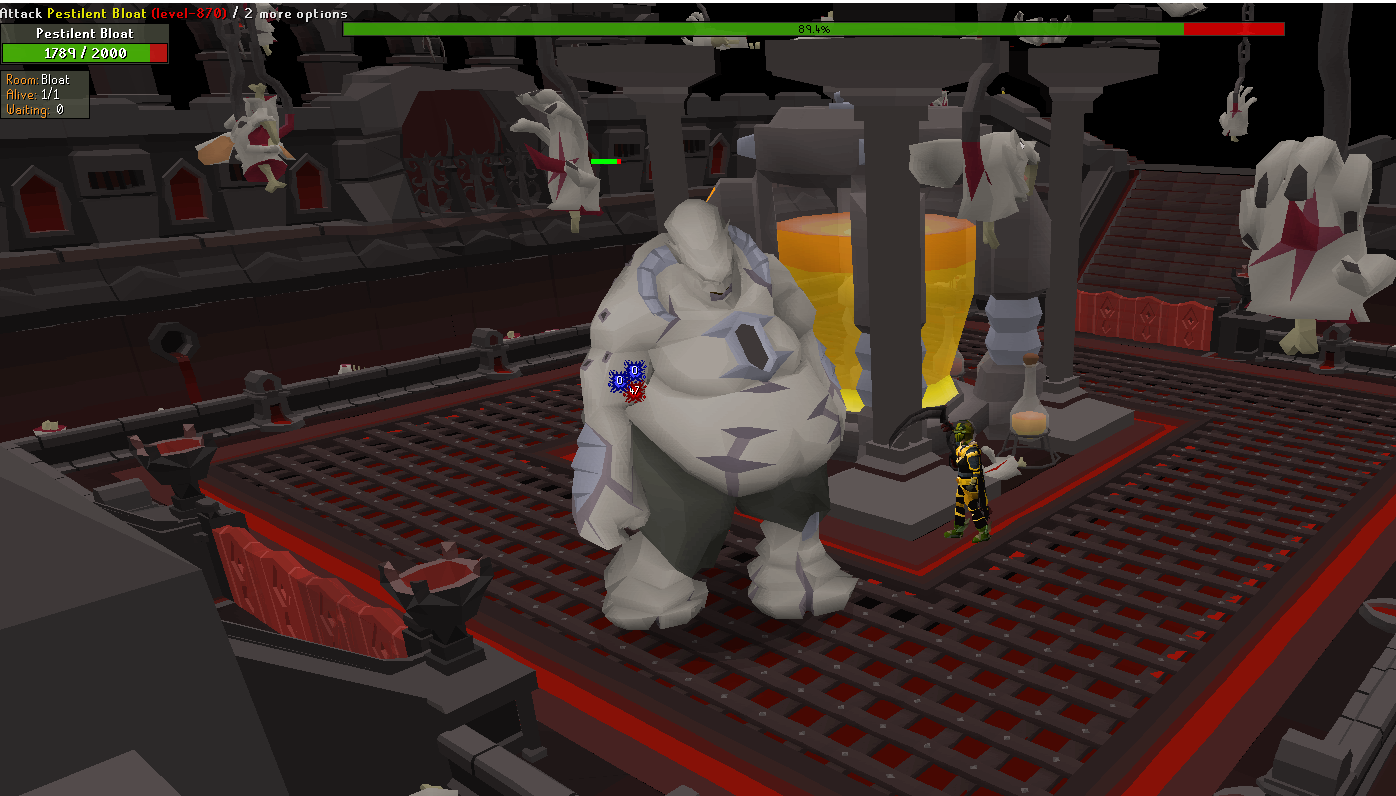
Flies: Bloat walks in circles around the pillar in his room, you have to stay on the opposite tile of his position on the other side of the pillar, if you get to close to Bloat where he can see you, he will attack you with flies, dealing damage every tick. Protect from ranged prayer will halve this damage. The flies can go around the corner so always try to stay diagonally from his position. Contrary to OSRS, flies don't spread to other players.
Falling Flesh: After every 'sleep' Bloat does, he will make flesh fall off the ceiling, you will see dark shadows getting bigger, and within a few ticks you will be hit by a big piece of flesh if you are in this position, dealing 30 to 50 damage, and stunning you for 3 seconds. You can avoid this by moving away. Make sure to keep an eye out for Bloat's position while doing this. He repeats this until he is dead. Multiple people can be hit by one piece of falling flesh if they stand in the same tile. One clever strategy for this room is to move to the tiles where flesh has just fallen, as flesh cannot fall on the same spot twice in a row and these tiles are safe for a few seconds.

Fight Overview
Before you go through the gate in his room, make sure he is on the other side of the pillar so you won't get damaged. "Dance" around the pillar to stay out of his eye-sight to prevent damage from Flies. Stay as close to the pillar as possible to make it easier for yourself. After a random amount of seconds, usually between 40 and 60, Bloat stops walking and falls asleep in position, at this stage you run to him ASAP and smash him with your DWH/SWH/BGS specs, and after that you damage him with your Scythe or other melee weapon. You will not receive damage from Flies while he's asleep. You can do about 4-6 hits until he wakes up depending on the speed of your weapon and how fast you reach him. Before he wakes up he starts moving a bit, this is your call to run away from him. If you are too close to Bloat when he wakes up, he will do heavy damage to you. After this, the Falling Flesh starts to occur, each and every time until he is dead. The falling flesh stops temporarily when he is asleep. For very experienced players who do not need the extra food, a Salve Amulet (ei) swap may be worth bringing to kill Bloat faster.
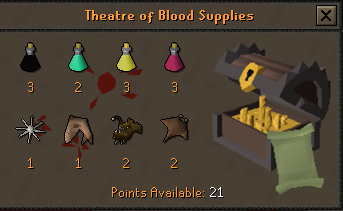
Supply Chest
After you've defeated Bloat there is a supply chest where you can buy supplies from. During each fight you will get points, based on your performance (How much damage have you done, how much damage did you receive, did you die?) you can use these points to buy some supplies. You can only access this chest after defeating Bloat and before entering the third room. After the fourth boss you'll get another chance to resupply of this chest in another room. After this you can not go back to these chests, so spend your points wisely. These points are not related to your total performance points.

The third boss: Nylocas Vasilias
Base Hitpoints: 2500
Immune to poison/venom: No
Best style to kill: All styles are necessary to kill this boss
This boss encounter has two phases. The first phase consists of killing waves of Nylos, and the second phase is the boss fight.
Phase 1
During this phase, Nylos will come out of the webs to the room, starting to damage the pillars or you. The pillars have to stay up, if they all collapse the fight is over and you are out. The Nylos come in three different colors, which corresponds with the style they can be damaged with:
Grey use melee and can only be damaged by melee
Green use ranged and can only be damaged by ranged
Cyan use magic and can only be damaged by magic
Using another style on a Nylo will not damage them. Every few seconds, a new wave of Nylos spawn, there is a cap so it won't be too flooded, but it can get pretty crowded in the room. The small Nylos have 10 HP, the more players in the room, the higher HP they have. There will also be big Nylos spawning, they have 20 HP and upon dying, they spawn 2 small Nylos. If a Nylo isn't killed within 30 seconds, it will explode, dealing 18 damage to players standing close to it. After 25 waves of Nylos, the big boss, Nylocas Vasilias will spawn.

Strategy: Keep protect from ranged up at all times. The melee ones will hit you the hardest, so if you get these on you, kill them ASAP. After those, kill the magers and the rangers. You can use Blood Blitz/Barrage on the magers to heal up a bit. As you are praying ranged protection, the rangers have the least priority. Try to kill one big guy at a time, as the spawns will always target you, and if you are unfortunate, they can deal a lot of damage on you. The trick on phase 1 is to stay calm. Kill what tries to kill you first. Get the big Nylos off the pillars and kill the spawns. Kill the small Nylos on the pillars in-between. If you have high hitpoints you could leave one or 2 small magers on the pillars, you can use those later to heal up. Don't start panic eating food, as Blood Blitzing/Barraging a few magers, or getting a few Master Alex pet effect procs on you can also do a lot of healing.
Phase 2
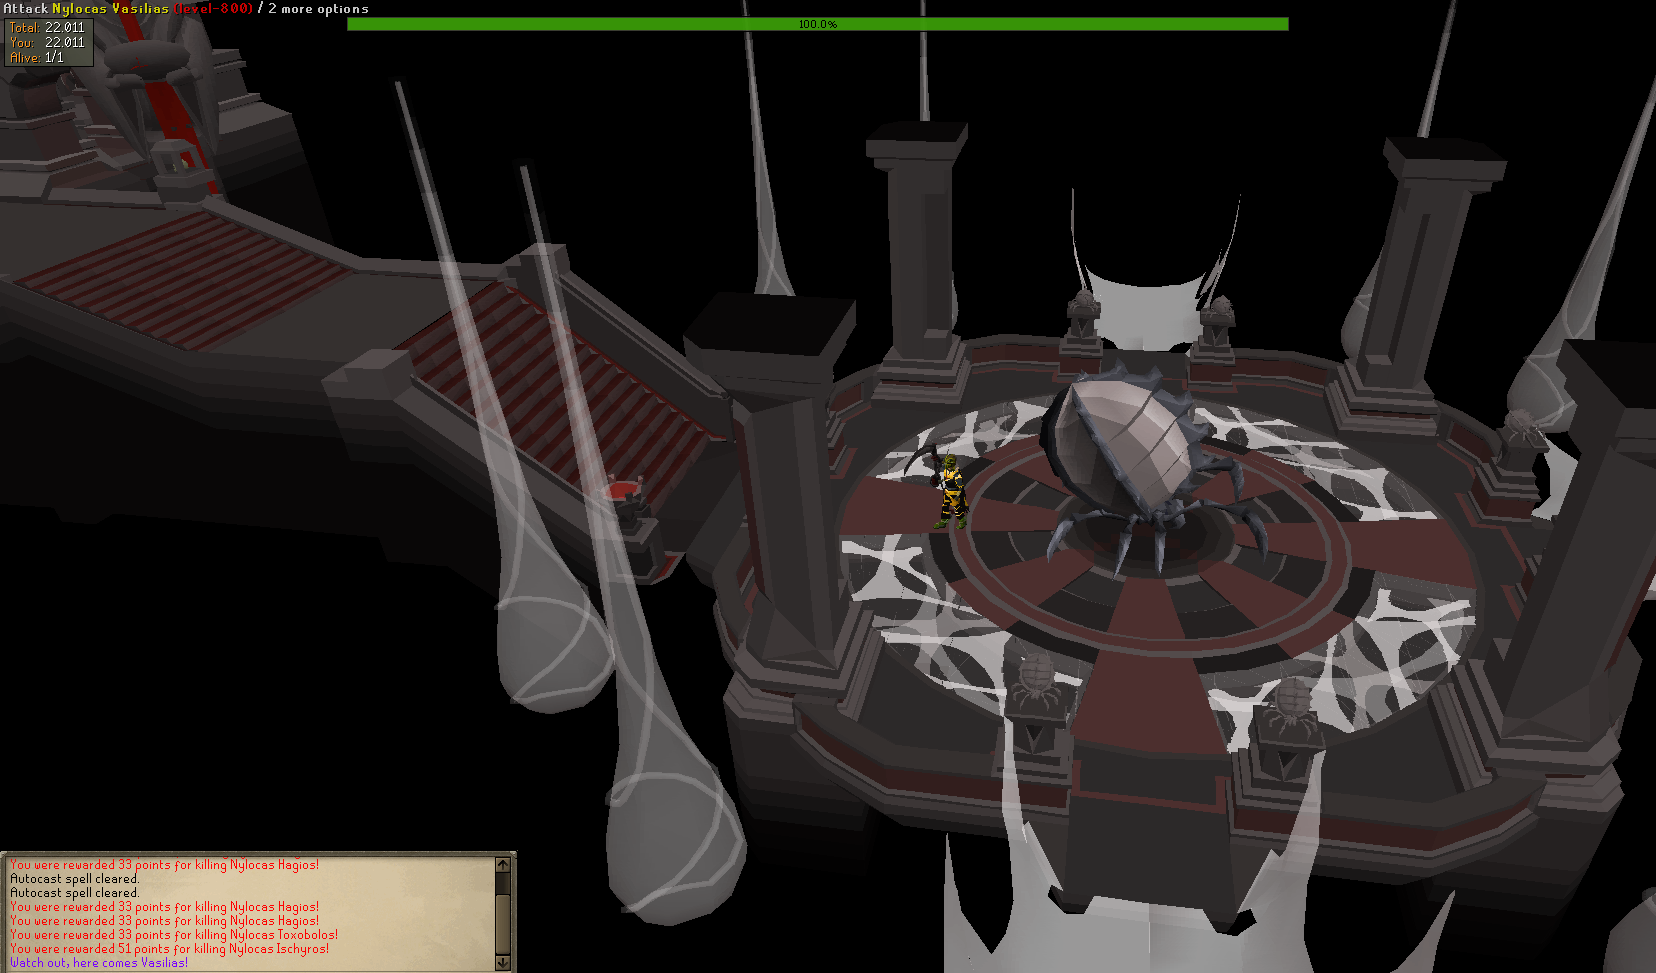
After you've killed all the Nylos, the big boss, Nylocas Vasilias will spawn, a warning will appear in chat. Vasilias changes colours every few seconds, corresponding with styles the same way the small Nylos do. When he's grey, he does melee damage and is damageable by melee damage, if he's green ranged, and if he's cyan magic. But, damaging him with the wrong style will heal him and the damage retaliates! You can easily kill yourself within a few seconds if you're not paying attention. Your character will automatically stop attacking him when he changes colors, so no need to click away. Just try to prevent spam clicking the boss at all times so you won't accidentally kill yourself.
He starts in melee phase, put protect from melee on and spec him twice with your DWH/SWH/BGS (or twice with dclaws and once with Scythe/Whip if you are tick perfect), Vasilias will switch to another style, put the right prayer and weapon on and damage him. You should always swap prayers before switching gear and attacking him. Blood spells may be used to passively heal for mage phases. You could only equip a weapon and keep wearing the same armour the whole time, being less accurate, but also saves you switching each time. Casting spells in melee or ranged gear is possible, as spells are reasonably accurate. Don't be afraid to not attack him a round if you messed up with your prayers or switching. Better to not attack him for a round than try to be quick and accidentally kill yourself. His ranged and magic attacks are quite accurate and can hit up to 17 through protection prayers. Rinse and repeat until he is dead. After he is dead you walk out of the room the same way you came in, walk a bit back and go to the right to enter the next boss room.
The fourth boss: Sotetseg
Base Hitpoints: 3000
Immune to poison/venom: No
Best style to attack with: Melee
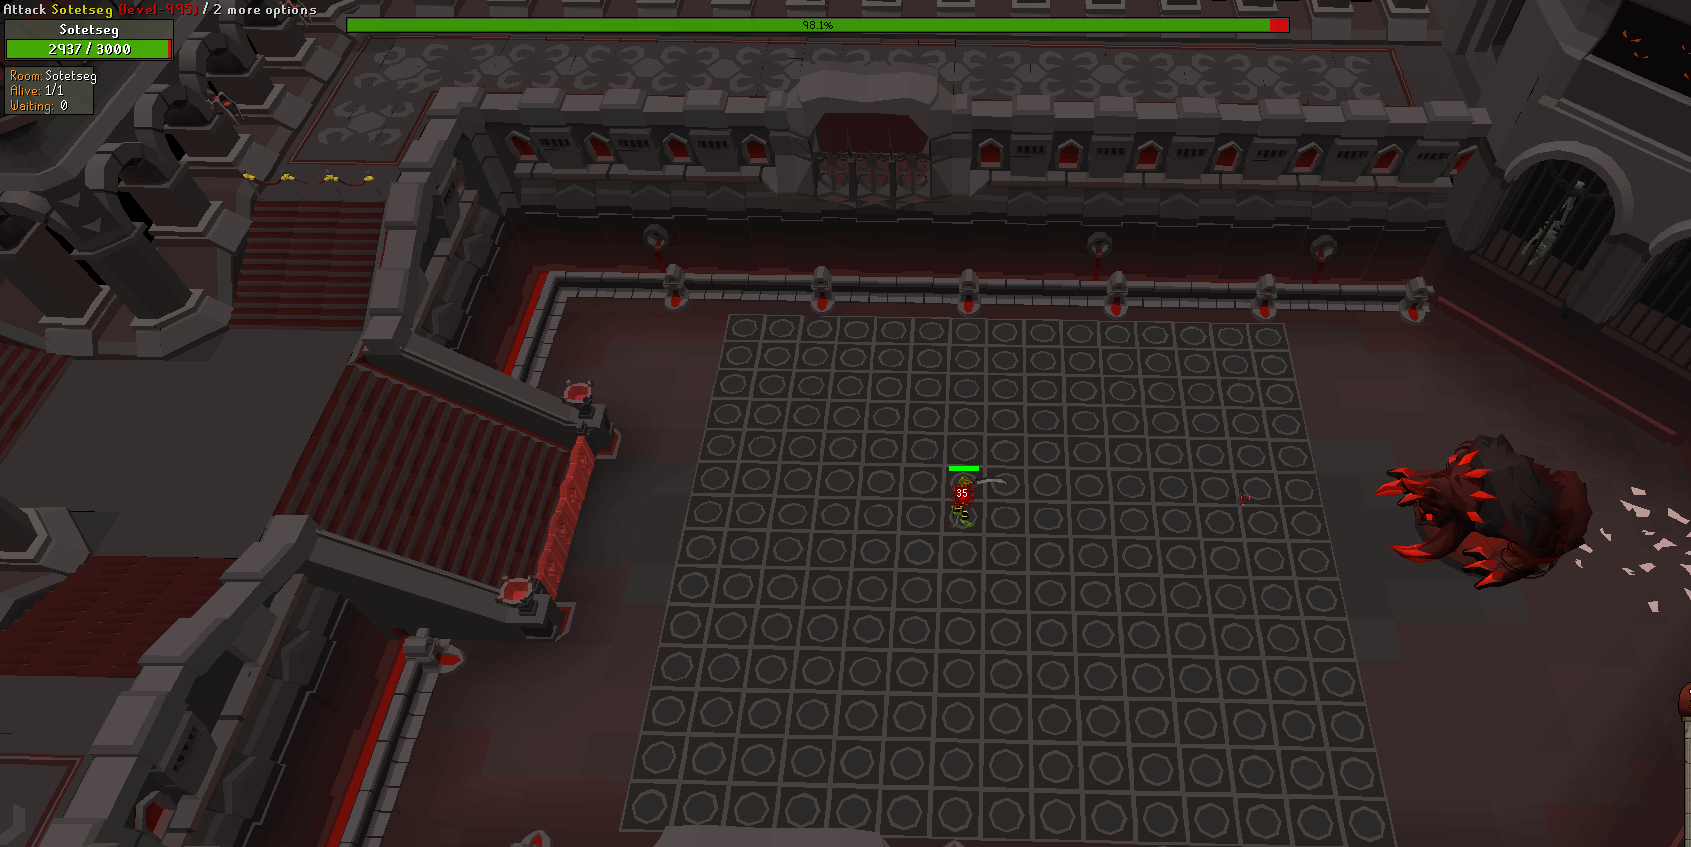
Sotetseg has 2 basic attacks, a magic and a melee attack. If you do not get in melee range, he will only attack you with magic. This makes it possible to 'flick' attack him. Stay at least 1 tile away from Sotetseg, attack him when (or slightly after) he attacks you with mage, then step back again and wait, rinse and repeat. His magic attack is a small red ball floating to you. Both his mage and melee attacks can deal over 50 damage, but 0 if protected against. It is advised to use protect from mage and flinch his melee attacks. The magic attacks will ricochet off of you to other players, which is another red ball which does magic damage, or a grey ball, which does ranged damage. These ball float a bit slow so it is possible to protect pray against them. If there are a lot of players in the room, a lot of balls could be floating around, so it is recommended to keep focusing at all times what happens around you. If you don't pray accordingly you can get a lot of damage and your protection prayers will be disabled for a few seconds.
Sotetsed can also fire a very large red ball, which will very slowly float to one player. All players need to stand on the same tile when the ball lands to spread damage, if not, the player being targeted will get very heavy damage and most likely be killed. It is advised to talk beforehand with your team where you are all going to stand when he does this attack, during the fight you won't have time to talk. It is an unwritten rule the tile in front of the boss's head is used for this, but it is always good to talk about this. If you are doing this solo, the damage off the red ball obviously can't be spread to other players, so you can just stay in the same place and face the consequence. The damage in a solo run will be lower than in a group.

At 66.6% and 33.3% of health left, a maze will begin. A leader is picked and sent to the shadow realm, that has to guide the path for the team members still left in the room. Every tile the leader clicks will also light up in the teams room (only 1 tile at a time). The leader will take 1-3 damage every few seconds will in the shadow realm. The maze will start as soon as the leader steps on to the 4th row of tiles in the maze (a tornado will spawn, that will wipe out the path behind the team) Should a player be caught by the tornado, or stand on a tile that is not part of the path, they will be dealt rapid damage of around 17. As soon as all players have finished the maze, Sotetseg becomes attackable again.
www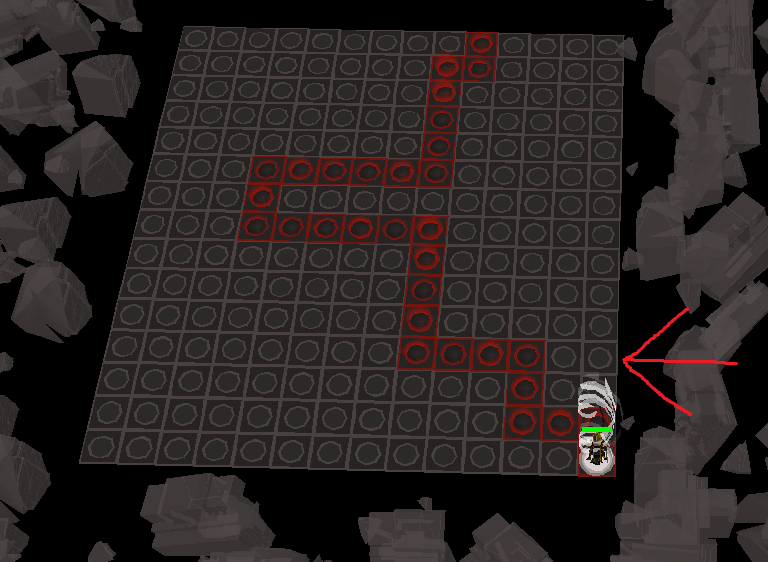
When on the fourth row, pointed out by the arrow, is when the players surfaced will get a tornado after them. Wait on the 3rd row and ask for confirmation, then start running over the red tiles to show the path for the players surfaced.
The best way to deal with this is when the 'leader' is on the 3rd tile ask if the team surfaced is ready and if so, he starts running. Make sure to stand still very shortly at corners (one tick is long enough) so the team can see what route to follow, as damage will be dealt to them if they stand on the wrong tile. Because of the way running works in OSRS you are able to move 2 tiles in one tick, this allows you to complete the maze faster and dodge potential damage by shortcutting sections that are "U-shaped" like the middle in the above image.
After killing Sotetseg, you can run back through the same door to reach the next boss. There will be another supply chest next to the door, this is the last one you have access to, so resupply as much as possible.
The fifth boss: Xarpus
Base Hitpoints: 3000
Immune to poison/venom: No
Best style to attack with: Ranged or Melee
The boss consists of 3 different phases:
Phase 1
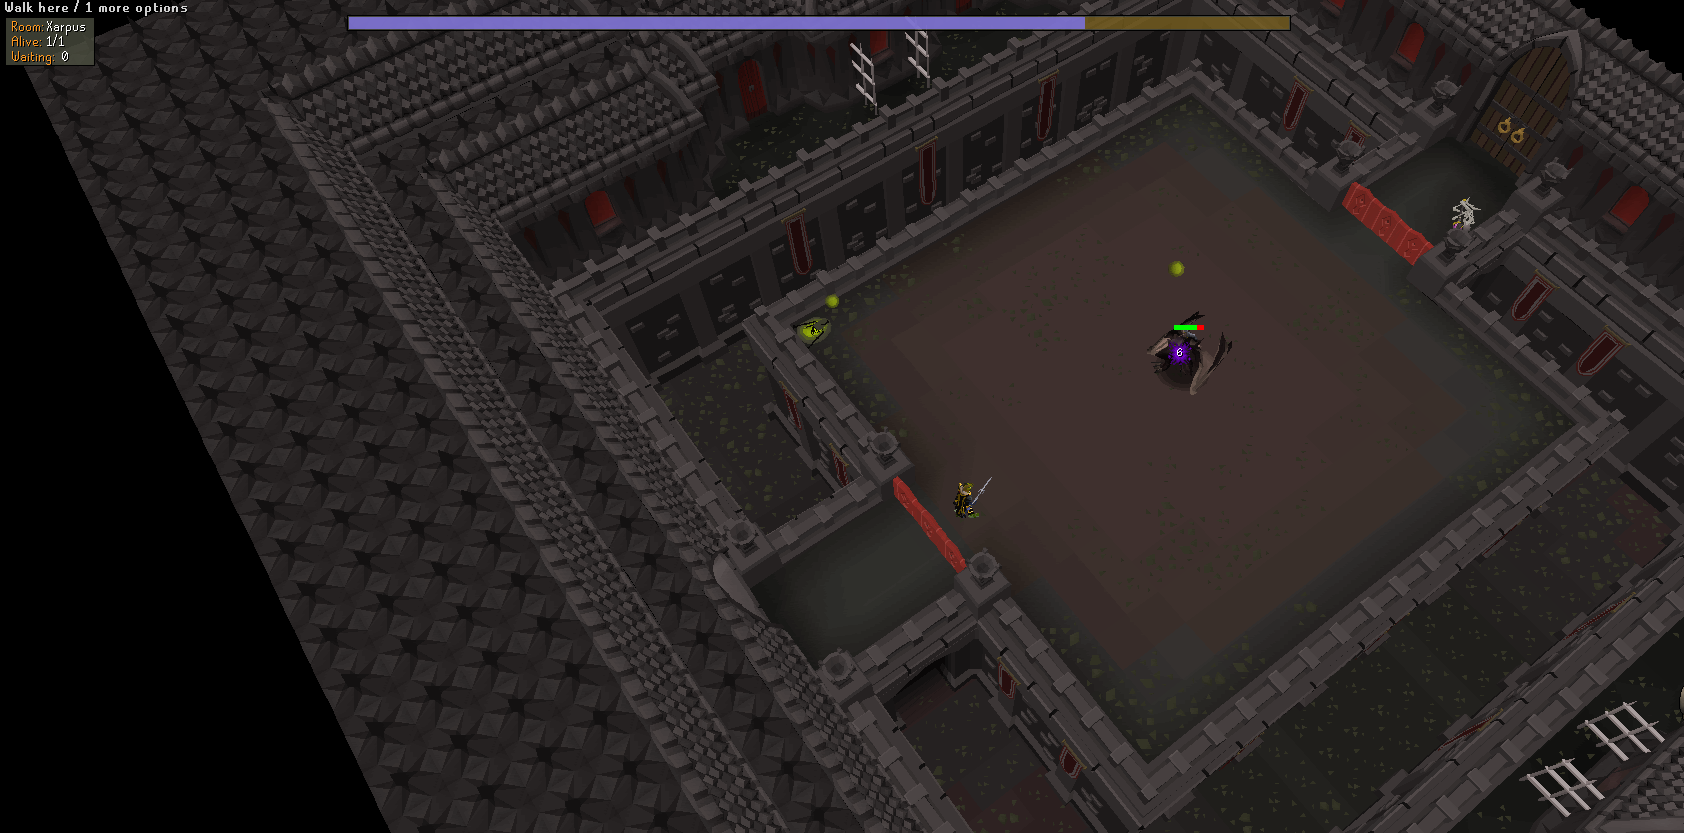
Xarpus will stand unattackable on the ground in the centre, the boss spawns at 75% of its max HP and will start resurrecting Exhumed Skeletons, which will rapidly shoot healing projectiles towards Xarpus. This can be prevented by standing on top of the projectile, which will stop the healing (until the player leave this position). After 9 seconds the skeleton despawns and moves to a new location. The more players there are in the raid, the more skeletons spawn each time, but there will never be more skeletons than players at the same time. Obviously the boss having less HP to start with is a goal to aim for, but also the more Xarpus is healed in phase 1, the less points you will get in the end.
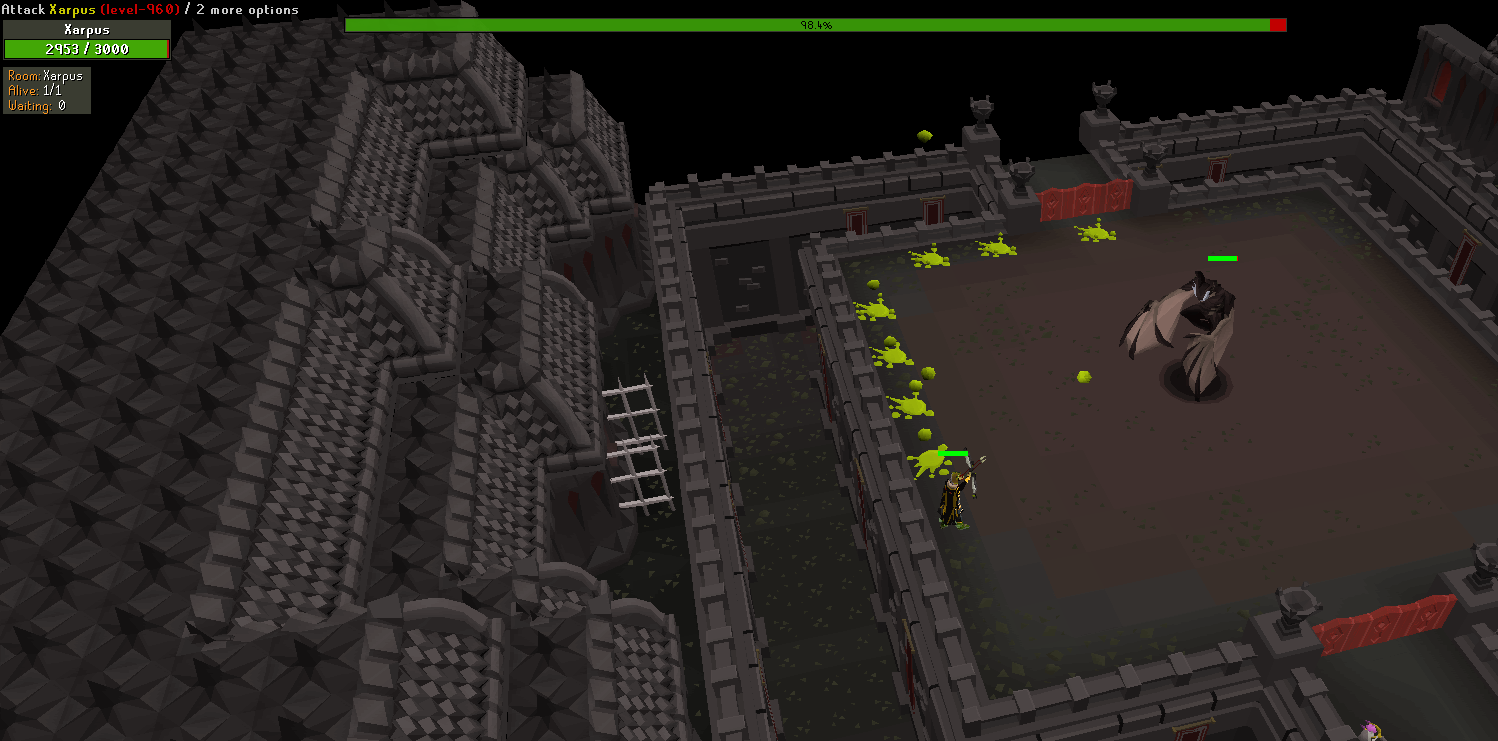
Phase 2
Xarpus will rotate around different players, and shoot acid pools at them. These pools stay for the entire duration of the fight and if a player is standing on them, they will receive rapid damage (and get poisoned). These pools will shoot "ricochet" balls, which will launch towards another pool, if a player is standing within 1 tile next to a pool as it lands (or a ricochet pool landing) they will be dealt splash damage on impact. Standing under Xarpus (same as phase 2) will deal you rapid (light) damage and should be avoided at all times. The best way to deal with Xarpus is to stay on the outskirts of the area. Attack him with a Twisted Bow and move 2 tiles away when he attacks you. Shoot an arrow at him then move again. When there are no tiles left, move a row close to the boss and repeat this process. This way when you come close to the boss, you can finish him with melee.
Phase 3
This phase starts around 25% HP left. You'll know when phase 3 starts when Xarpus yells "Screeeeeeeech!". Xarpus will face a random one of the 4 directions (NW, NE, SE, SW) a player standing in his viewing direction should not attack Xarpus as he will deflect and deal high damage to the player and most likely kill you. This is done almost instantly when he turns, so a player should count their attacks and manually stop attacking before he turns and not wait for the animation. Also in this phase you should never be standing under Xarpus. In this phase he stops shooting acid pools around, so if you have left a 'circle' free around him, you can attack Xarpus with melee while avoiding his attack, and not have to worry about standing in acid pools.
The sixth Boss: Verzik Vitur
Base Hitpoints: 5500 (spread out over 3 phases, 1500 HP in P1, 2000 in P2 and P3)
Immune to poison/venom: No
Best style to attack with: Magic on Phase 1, melee on phase 2 and 3
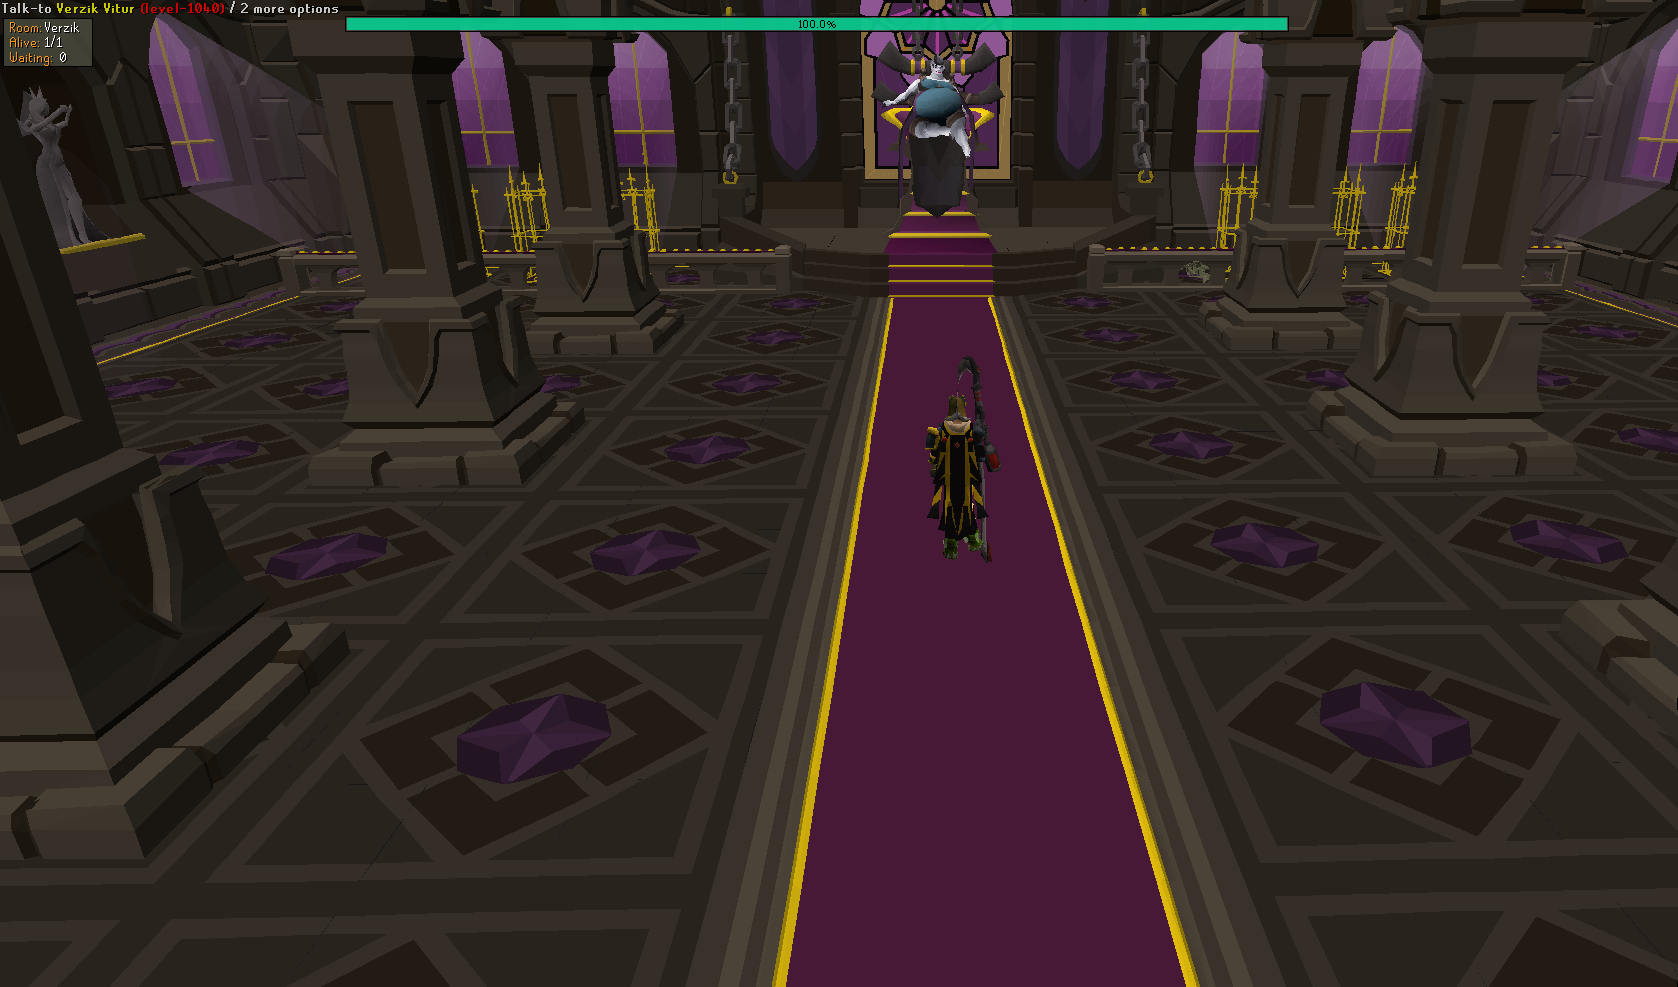
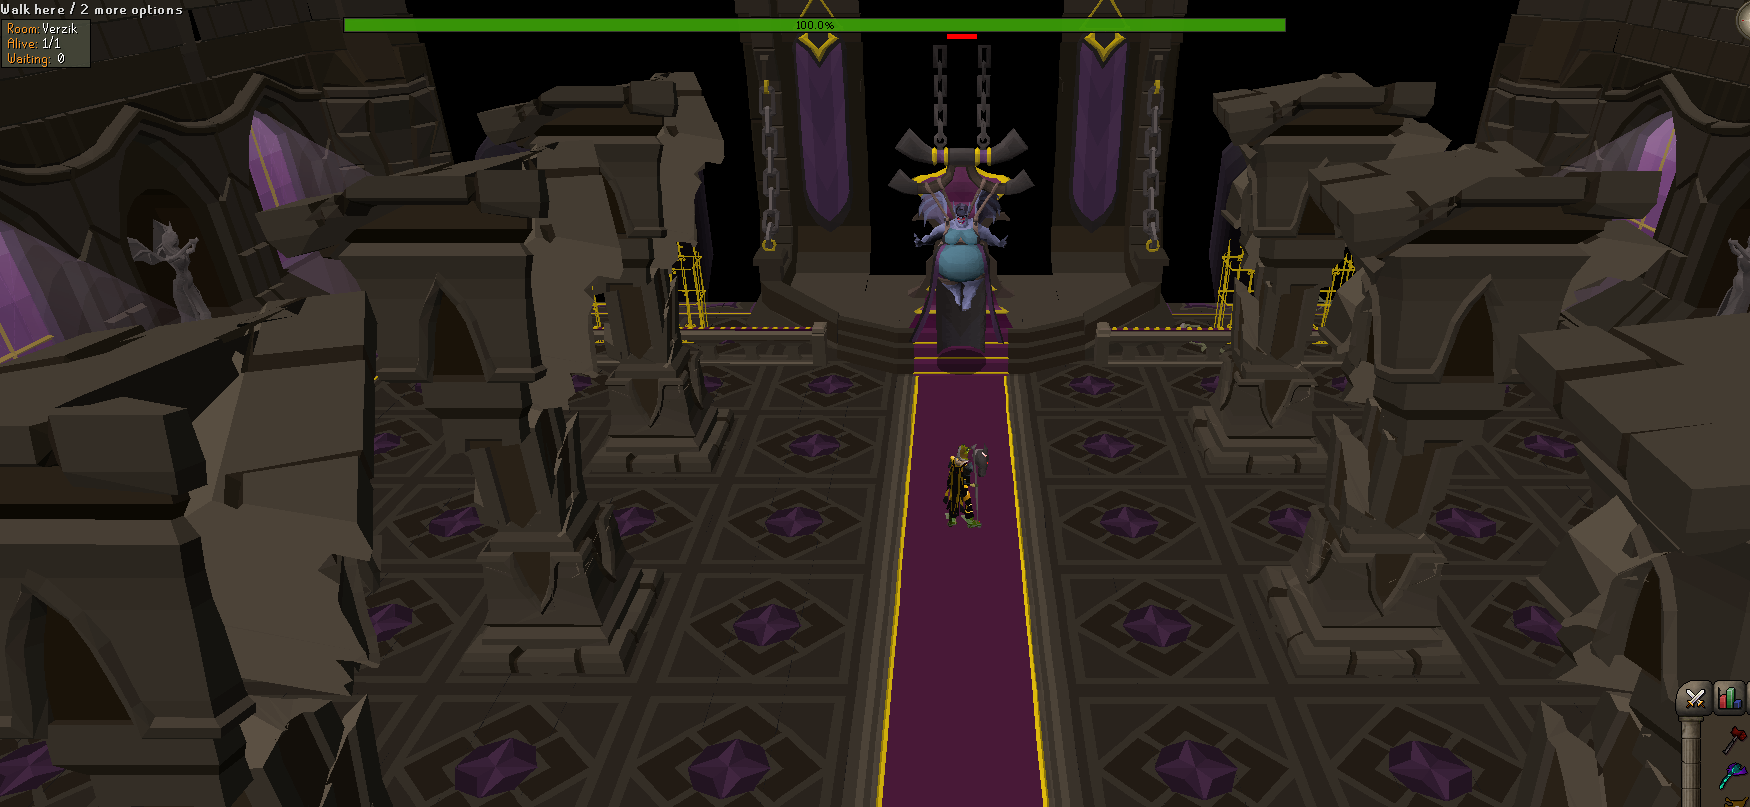
Before advancing from the Xarpus room, a player is required to pick up the Dawnbringer staff from the skeleton. This is a special staff which can only be used on the first phase of Verzik Vitur in ToB. After Phase 1 is over, or everyone is dead, the staff will disappear. If a player teleports, or logs out with the staff, it will be dropped on the floor. Dawnbringer will be seen instantly by other players when dropped on the floor. Proceed to the last room and talk to Verzik Vitur to start the encounter.

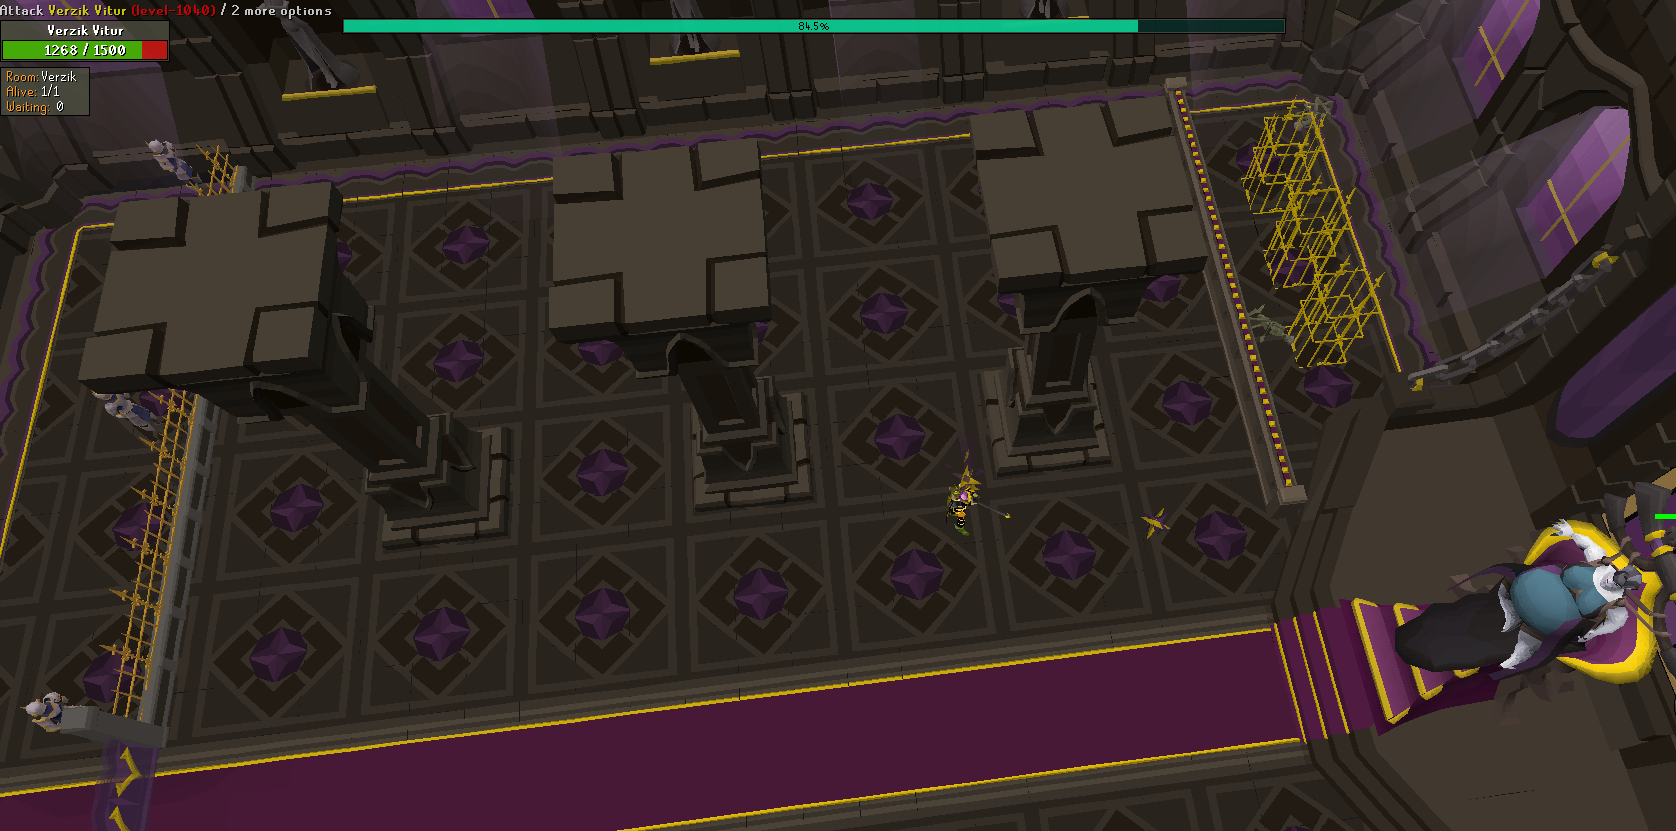
Phase 1 (Base 1500 HP)
There's 6 pillars spawning in the room, Verzik will shoot a very strong projectile attack towards each player, this can hit up to 137 (or 68 if using Protect from Magic).
If a player is hiding behind a pillar, their ball will be redirected towards, and damage, this pillar. If all players are behind the same pillar, it will shoot one ball to the pillar. If players use different pillars, all used pillars will get a ball of damage. If players are not hidden, they will all get hit, with the exception of players hiding behind the pillar. It is advised to stay at the same pillar with all players. Verzik has a very high defence in this phase, only magic is a bit accurate, and the Dawnbringer staff is very accurate. It's base damage is low, but it's spec can hit up to to 150! It is advised to use 2 specs on Verzik, then drop the staff for another player to pick up, use 2 specs, drop it again for the next. Rinse and repeat to get the maximum specs out of it as this deals the most damage. Other players can damage Verzik with magic or Scythe if they don't have Dawnbringer. It is advised to use Blood Blitz if a player is hit by Verzik to save food, at least until the next phase and only if you are above 68 hitpoints. After 5 to 8 hits, the pillar has received too much damage and will collapse. Standing next to a pillar upon collapsing will deal heavy damage, make sure to run to another pillar before the pillar hits the ground to avoid collision damage. Talk to your team beforehand in which order you are going from pillar to pillar. Verzik has 1500 hitpoints (higher if with a team) in this phase, upon reaching 0 hitpoints, phase 2 will start. All the pillars collapse so make sure to stand in the middle to prevent getting damaged, and Verzik will float to the middle of the room.
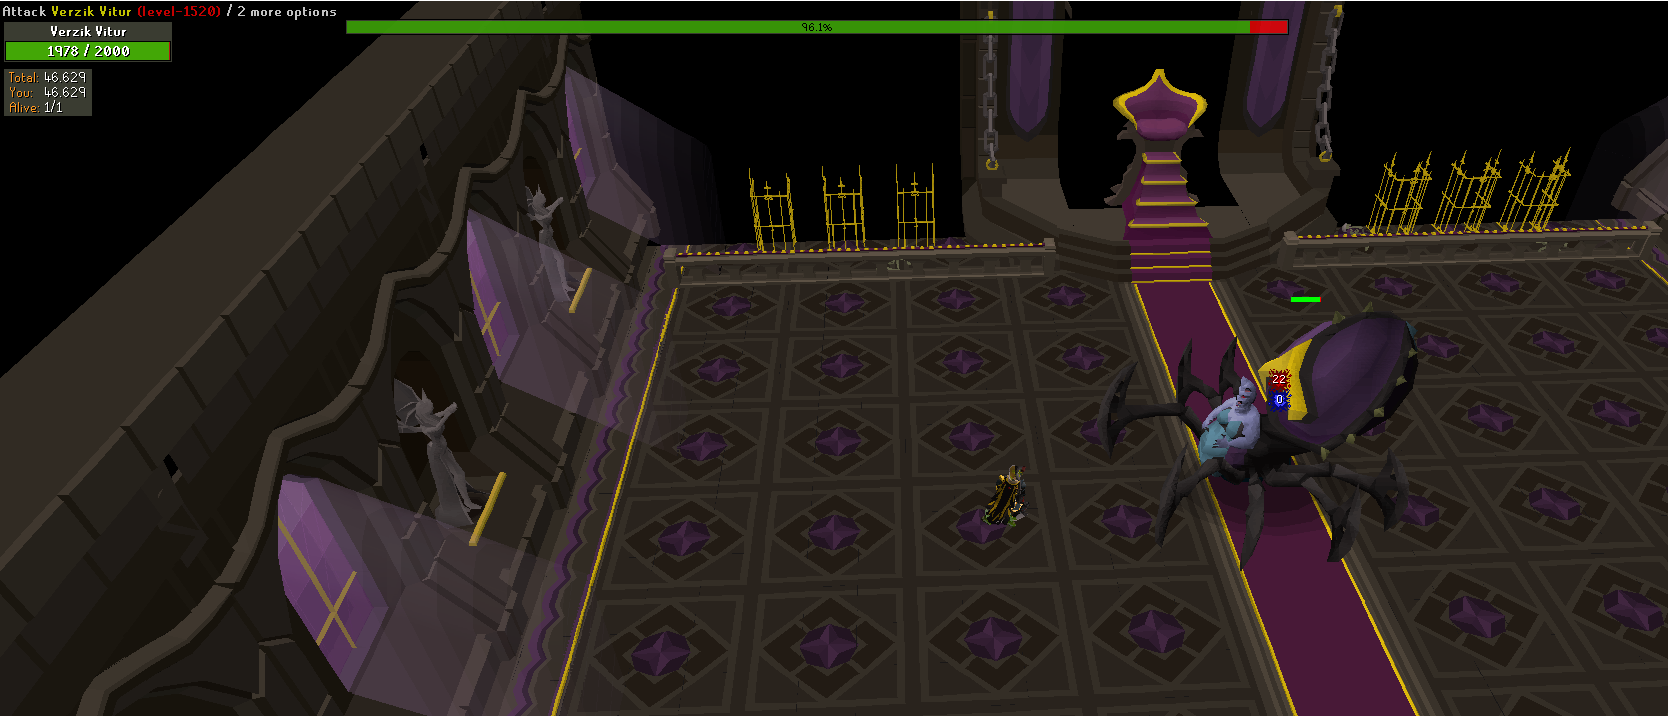
Phase 2 (Base 2000 HP)
Dragon Warhammer/Statius's Warhammer/Bandos Godsword attacks do not work vs Verzik in this phase. Verziks primary attack is ranged based, he shoots bombs at all the players (on their previous position), you can dodge these by tick walking or walking in a L shaped pattern. On the tick Verzik launches an attack, he will check if any player is within 1 tile distance from him, if this is the case he will do a "stomp" style bounce attack that pushes the player several blocks away and stuns them, this can deal high damage (up to 50), due to the stun timer the ranged bomb will usually hit almost at the same time. Damage her with melee while tick walking her attacks, so you are never in melee range when she attacks.
Every 4 ranged attacks Verzik shoots an Electric ball instead, that bounces between players (if they are not too far away) until all team mates have touched it OR it discharged on Verzik (and Verzik gets damaged), if not discharged the last player gets a lot of damage, this damage scales with the amount of players in the group.
Every 5 electric ball attacks she will perform a Nylocas attack, she spawns 1 Athanatos that will constantly heal her while it's alive. This can be instantly killed by Poisoning/Venoming it (this will also deal a very high hit to Verzik herself) kill this as fast as possible. At the same time she will spawn 1 common Nylo per player, these will follow the players around the room and explode once they get too close, dealing high damage to all nearby players up to several tiles away. You can avoid this by waiting until the Nylo is at you, then run away quickly when it stops walking/starts detonating.
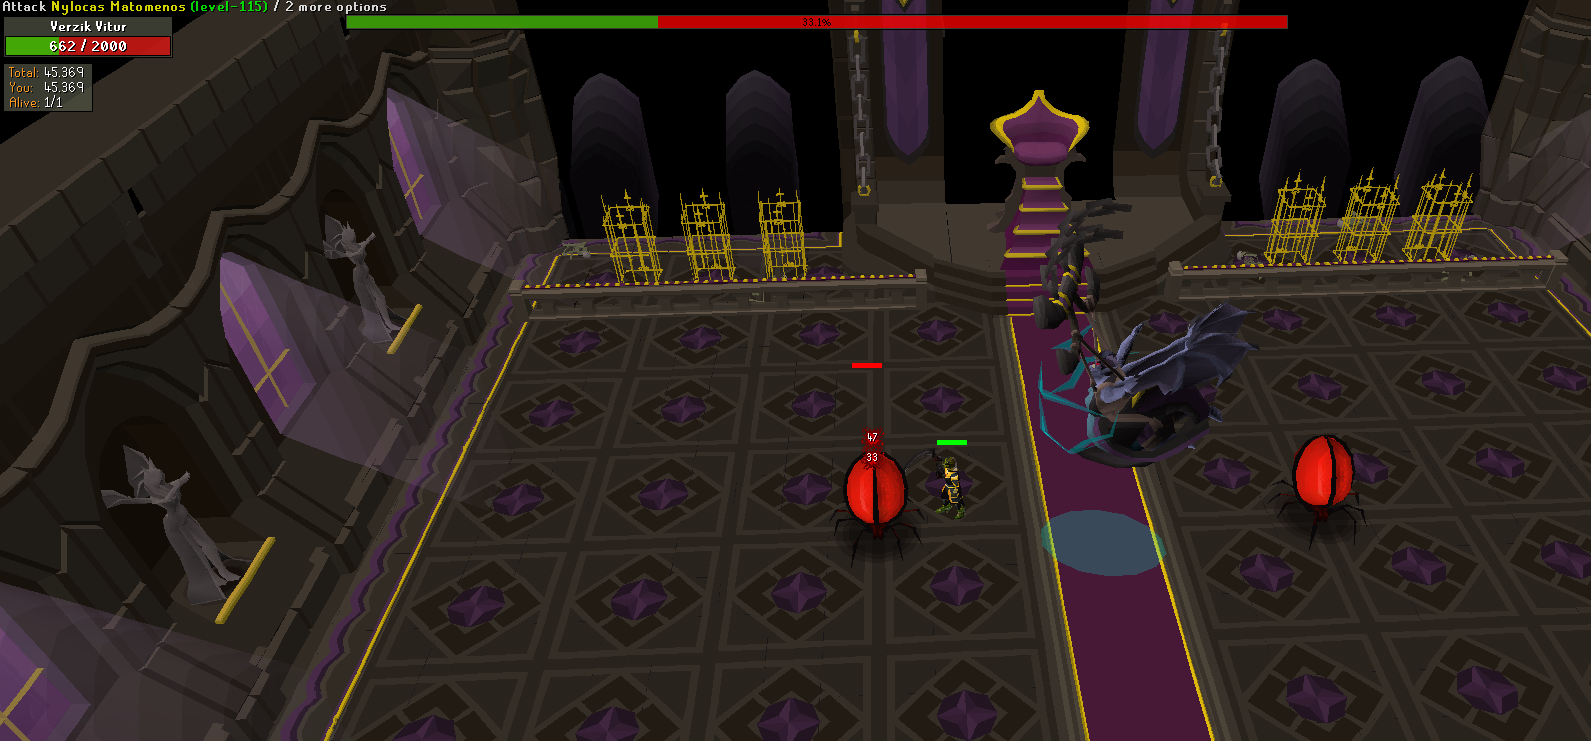
After she reaches 35% health, she will switch her ranged attack to a magic attack, a blood spell that heals her for 25% damage dealt. This attack is only targeted vs one player instead of the entire team, like the ranged attack. She will also spawn 2 Matomenos every 8 attacks, these work similar to Maiden, as they will heal Verzik for their remaining HP once they despawn after 24 seconds. If you are soloing, kill only one Matomenos, proceed to kill Verzik and let the other one live.

Phase 3 (Base 2000 HP)
Verzik will use 3 basic attacks (Mage, Range, Melee) and 4 different special attacks in a fixed repeating order. She will only use Melee if a player is within melee range (standing underneath her does not count). Below are the 4 special attacks:
Nylocas bombs: same as phase 2 but without the healing Athanatos.
Webs: she shoots webs around the room at several targets, if stuck in this web you can no longer move. The webs disappear after a short amount of time, dealing heavy damage to the player inside the web. Other players can attack the web a player is standing on to kill it and free the player.
Yellow auras: Safe spots will appear around the room, 1 per player. If a player is standing on one of these safe spots before the projectile hits they will receive no damage. Normally a safe spot can not be shared with other players, but on here we allow it as long as ALL safe spots are taken (so in a larger teams, we still only spawn 5 so some people need to share a safe spot which can be done safely as long as all the others have at least 1 player on them) Not being on a safe spot in time deals large damage, sharing a safe spot while not all are taken deals moderate damage to everyone sharing a spot.
Green ball: Players can bounce it between each other by standing close to the target, it will never hit the same target twice. If solo, the green ball just damages the player.
In this phase, act to the special attacks and try to kill Verzik ASAP with melee, kind of in the same manner as phase 2. DWH/SWH/BGS special attacks will work here, try to use them at the start of phase 3 and then walk out of range of her melee attack between your own hits, same as how you fought Sotetseg.
If you have survived until now, you have completed the Theatre of Blood! Congratulations! And now for the rewards...
A trapdoor will open below Verzik's Throne. Use it to enter the treasure room.
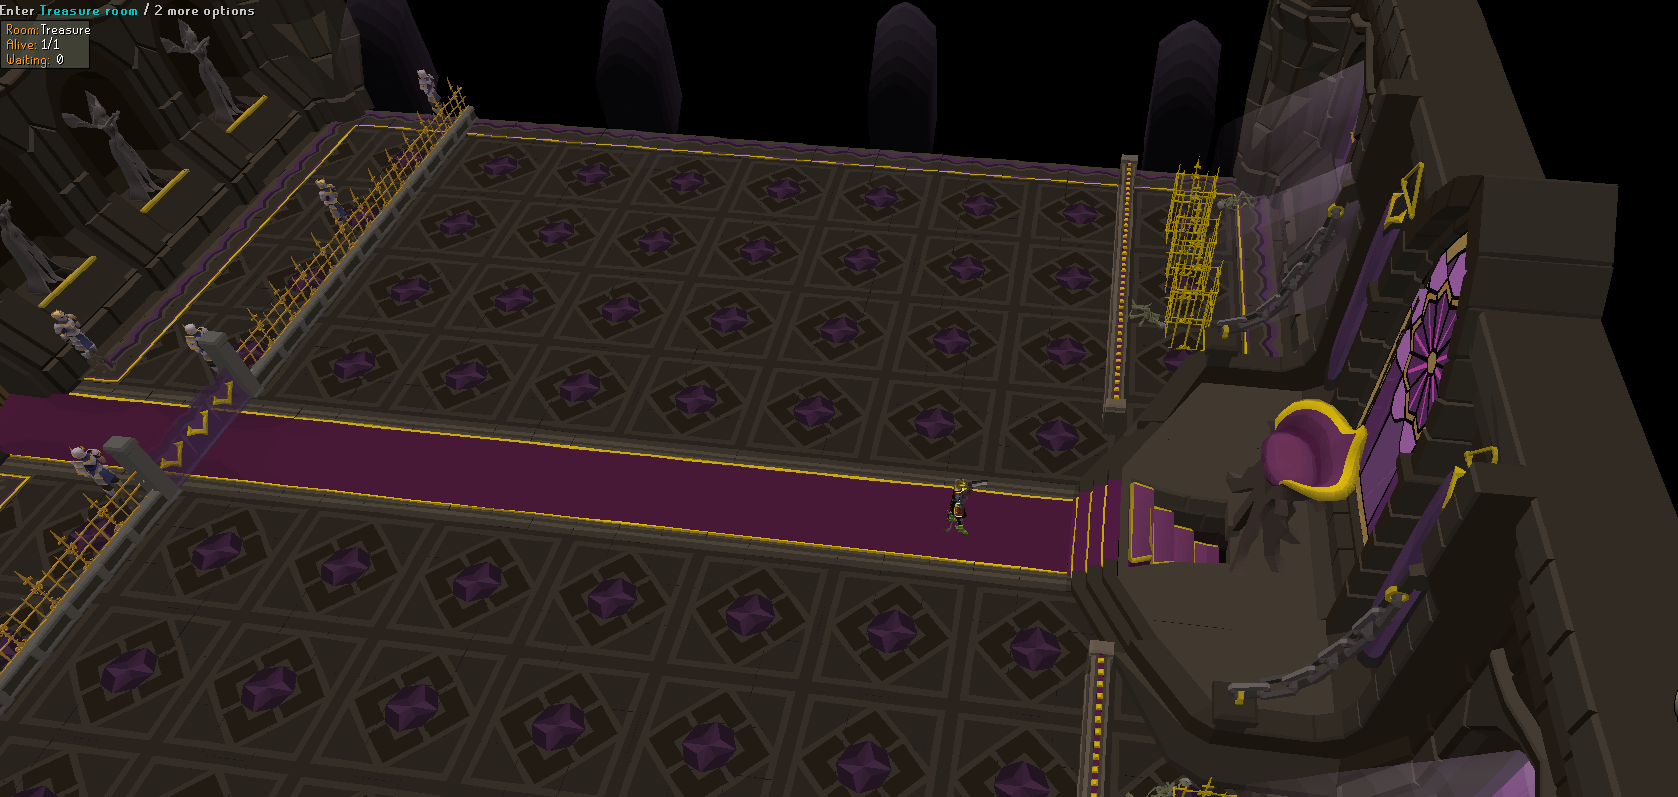
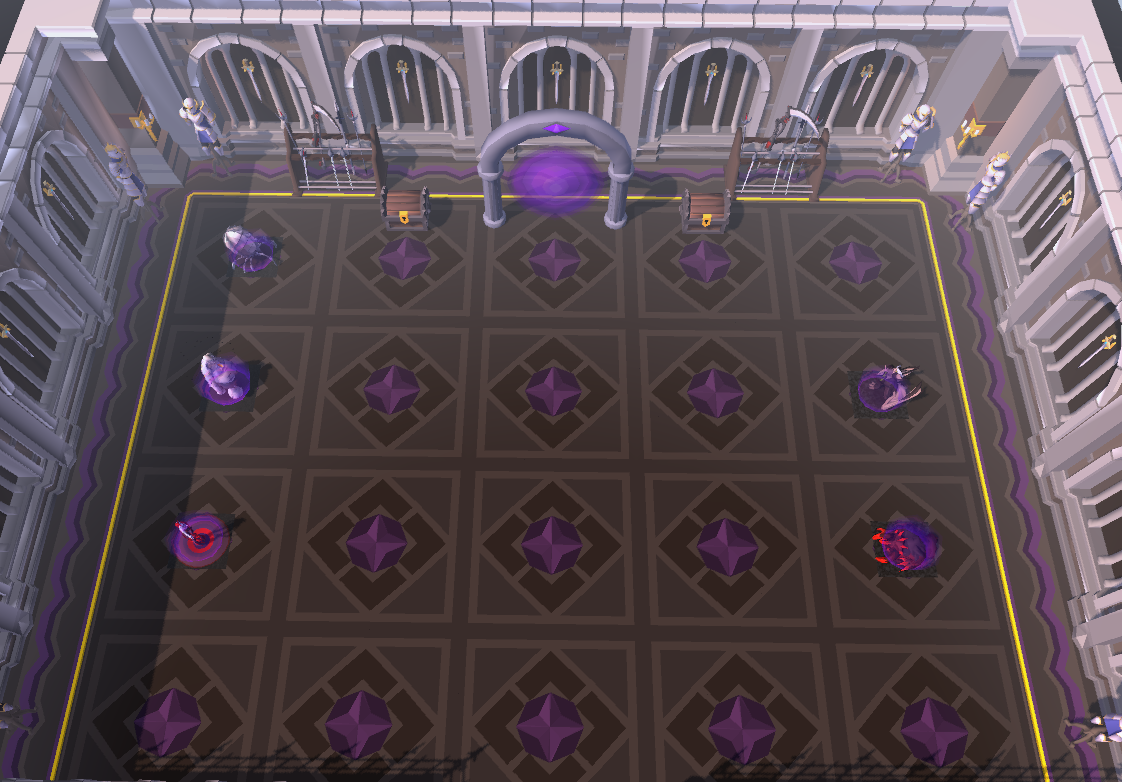
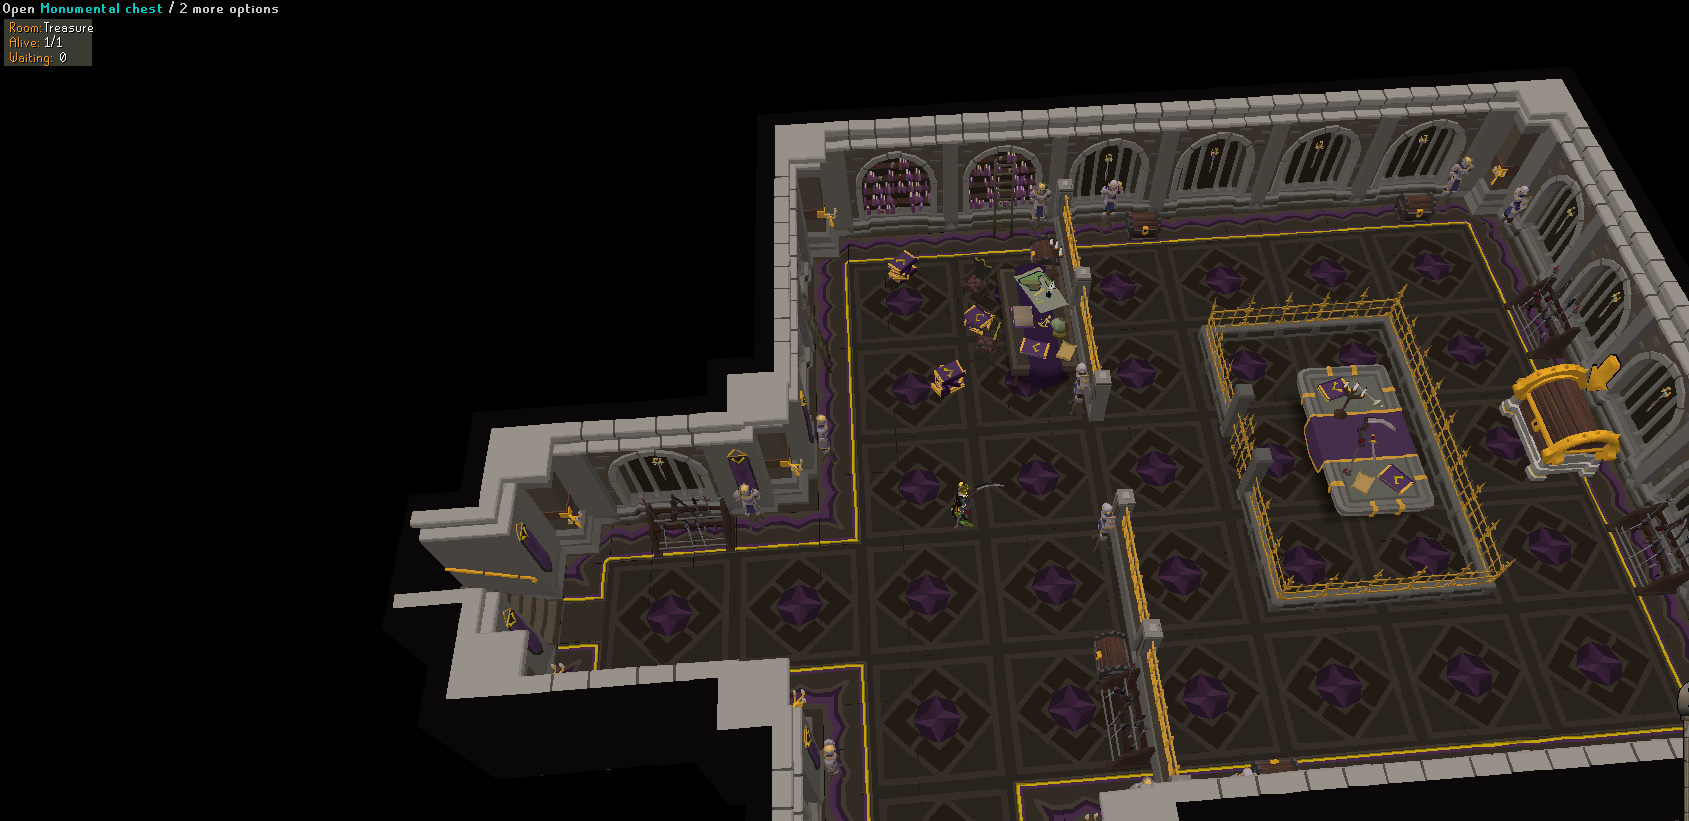
Welcome to the Treasure room! Upon entering you will see who was MVP (most valuable player) this will be the player who earned the most points. In the back you will see one, or multiple chests. Each player can open a chest (sometimes players get the same chest, they still have their own reward though, this is just visual) if a gold arrow with a purple line around it is shown, it means someone has got a unique drop! Fingers crossed...
Regular drops can be various skilling, as well as PVM supplies.

If you open the chest you will see this interface, you can use either buttons to respectively bank the items, or put them in your inventory. Ultimate Ironman can't bank these items. If you leave the Theatre without opening the chest, your loot will automatically be banked. Ultimate ironman, or players who have a full bank and inventory, will see the supplies dropped underneath them upon leaving. The theatre can be exited through the teleport crystal on the east side of the room.
Drops
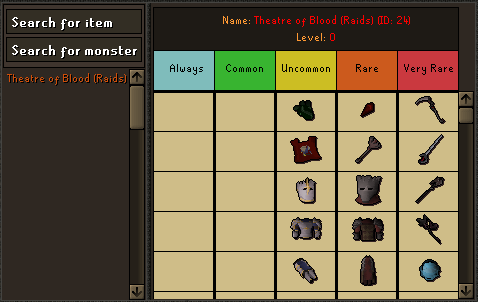

These are the unique drops you have a chance to receive when completing the Theatre of Blood. Each boss has a chance to drop a pet version of themselves as well! Everyone has a chance to get a unique drop, whether you've earned the minimum of 5000 points, or 50k. The higher points you have, the more, and better your regular drops will be. The more points you have increases the chance of getting a unique drop.
Points Explained
The amount of points you earn in a Raid is what decides on your chance of receiving a unique drop. There is a soft cap and a hard cap for a chance at a unique drop. The soft cap is a minimum amount of points you need to have the slightest chance at a unique drop. The hard cap is the highest amount of points you can reach before hitting the max chance of having a unique drop. Having more points than this hard cap will not further increase your chances. Also, the more points you have, the higher your supply drop will be if you don't get a unique item.
Here are the general rules for getting rares and how points work in ToB:
You need 5000 points to be eligible for the rare drop table
5000 points is a 1 in 45 chance for a unique drop (having less than 5000 points after Verzik has been killed will leave you hopeless at a drop).
Every 1190 points after 5950 increases your chance by 1 (7140 is 1 in 44 , 8330 is 1 in 43, etc)
The difference for Entry Mode is that every 1550 points after 6200 increases your chance by 1 (7750 is 1 in 45, 9300 is 1 in 44, etc)
53000 is the hard cap for points with a 1 in 5 chance for a unique drop. Any amount of points higher than 53000 after Verzik has been killed will not further increase your chance at a rare drop.
Side note: There is little difference between running a solo or group run regarding points, except the hard cap is set at 50000 in a group run instead of 53000, leaving you a slightly smaller chance to receive a unique drop (maximum of 1 in 7 at 50000 points). This is of course highly compensated with the speed you finish a run, and the fun you have when doing things together.
Drop Rate Reduction
The drop rate reduction also applies in the Theatre of Blood, but it does not just increase your chance at a drop. The percentage your DR is reduced is multiplied by your total points (but at a lower ratio), this means that your DR reduction percentage lets you reach the hard cap earlier, maximizing your chance for a drop at an earlier stage. Some examples:
The hard cap for a rare drop is 53000 points, which translates to a 1 in 5 chance at a rare drop. (Or 50000 points in a group, which translates to 1 in 7)
Drop rate reduction is only 70% as effective in Theatre of Blood. This means that if you have a 50% drop reduction, it will multiply your final point count after Verzik by (1.5 * 0.7) = 1.05. You may find your own point multiplier by using the equation ((DR reduction / 100 ) + 1) * 0.7 (The multiplier cannot be lower than 1)
Example: After you've killed Verzik you have 40000 points. If you have a 50% DR reduction the game calculates your drop using the following points: 40000 * ((50 / 100 ) + 1) * 0.7 = 42000 points. Or you may simply multiply your final point total by the converted multiplier, found using the equation in the above paragraph (40000 * 1.05 = 42000). So while you've gained 40k points, the game acts as if you had 42k points, thus giving you a 1 in 14 chance at a drop instead of 1 in 16.
53000 is the hard cap for points with a 1 in 5 chance for a unique drop. Any amount of points higher than 53000 after Verzik has been killed will not further increase your chance at a rare drop.
I will list some examples for the point totals required to hit the cap of 53000 or 50000 depending on your drop rate %:
Solo (53000 cap) Group (50000 cap)
45% DR: 52217 49262
50% DR: 50477 47619
60% DR: 47322 44643
70% DR: 44538 42017
75% DR: 43266 40817
Unique drop tables
No Comments