
Archangel & Archdemon guide
The Archangel & Archdemon are Two custom made RuneRealm bosses. They are respectively combat lvl 777 and 666 and have a whopping 1000 hitpoints. They require at least two players to kill. There might be ways to kill the bosses solo such as using Insta-kill darts but those will not be covered in this guide.
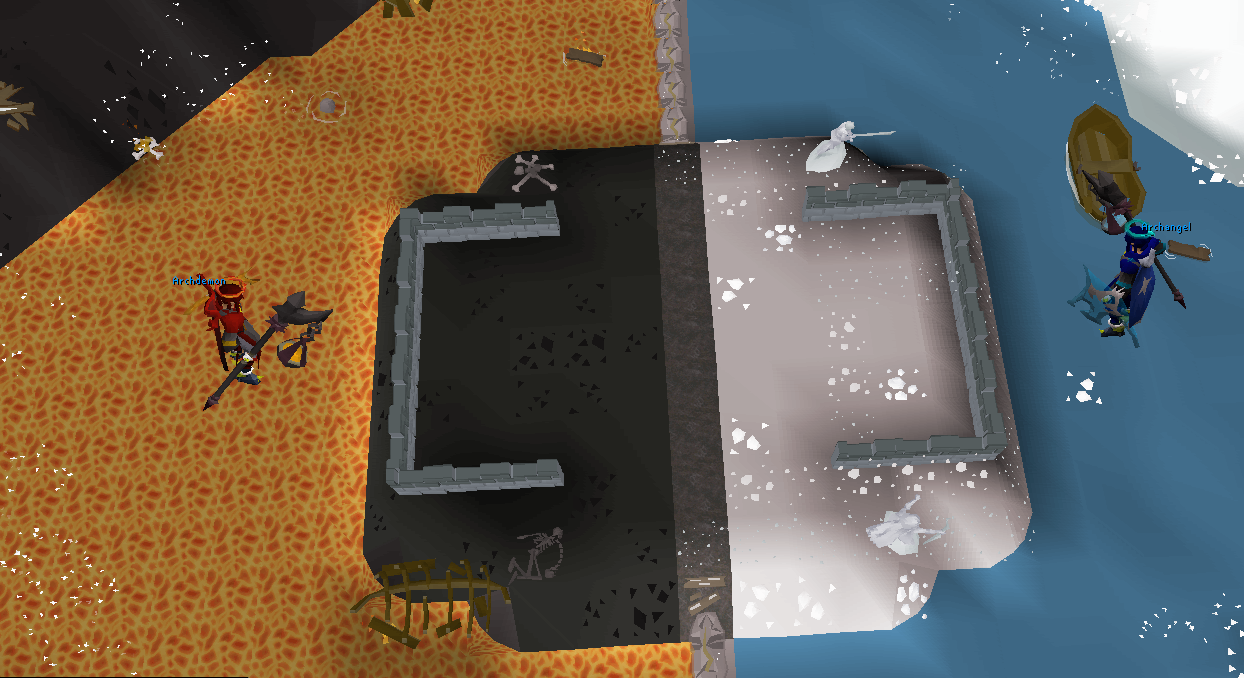
These 2 bosses rely in a small area, each part of the area belongs to one boss. They both float above the lava or water. You can only attack them with ranged or magic, ranged being the best way. The bosses are able to hit you from anywhere around the platform, there are no safe spots. During the fight the areas can be split up as well, disabling players to move to the other side. They attack random players with magic damage. Keep protect from magic up to mitigate most incoming damage. The bosses have a few different mechanics as well. Every few attacks they do one of their special attacks. Note that if one of the bosses die, the other boss will take over the mechanics of the other boss. They can heal each other sometimes which will be explained further down below. Note that the bosses don't have to die at the same time. If one of them dies, it won't respawn until the other one has been killed to.
Special attacks
Healing
Bosses have to stay within a certain threshold of HP of each other. If the difference between their hitpoints becomes to big, they start healing each other. It is important to keep the same amount of players, or dps on each side. They will also receive healing if one of the bosses has not been attacked for 15 seconds. They will then receive healing once every 5 seconds, until both bosses have been hit once again.
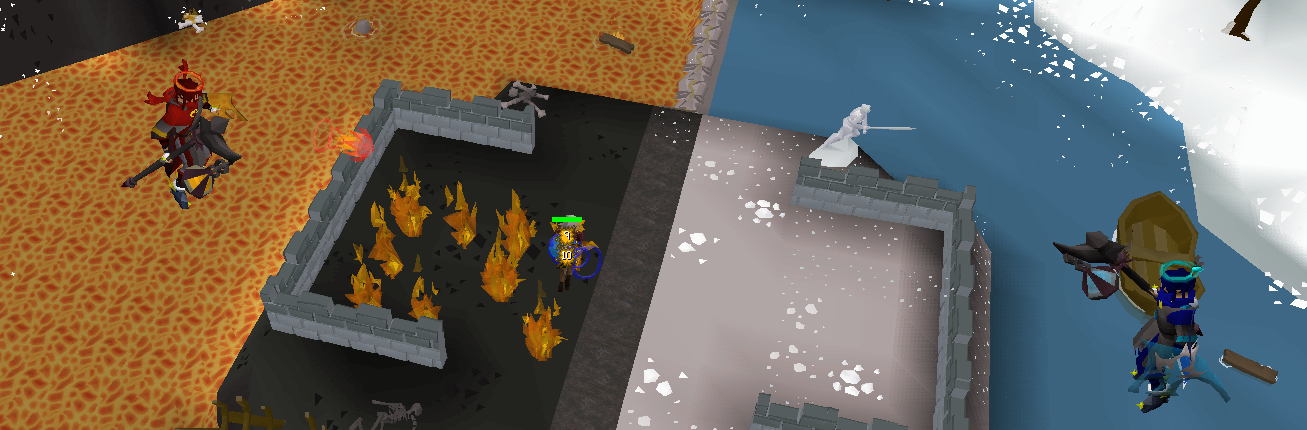
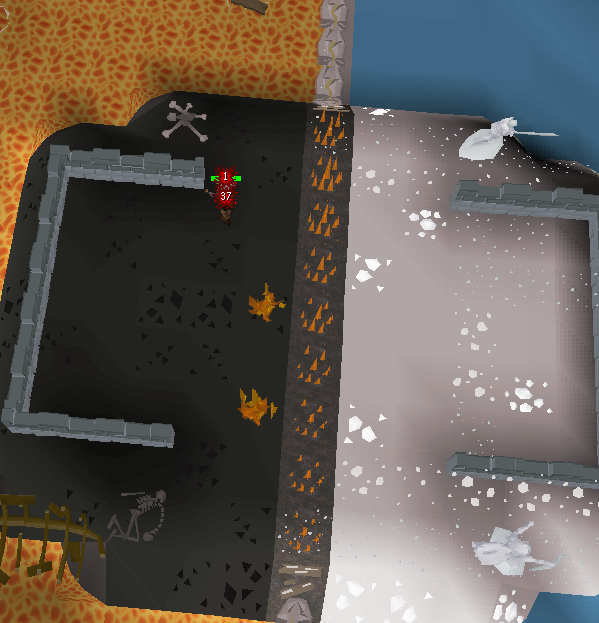
Fire walk
Archdemon puts a fire under you, damaging you very fast for 8-12 damage the whole time you stand in the fire. The fire will follow you around for about 10 seconds and leave a trail of fire. If other players stand in this they will receive the same damage too. The fire stays up for quite some time. When the boss is dead, the fire won't damage you anymore if you stand in it.
Spheres
Archdemon will shoot a sphere towards up to 3 random each with their own style of attack. There will also be a message in chat if a sphere is sent towards you. Red (aggressive) = melee, Green (Accuracy and dexterity) = ranged, purple (magical power) = magic damage. Your overhead prayer will be disabled at the start of this attack so you can't rely on these beforehand. If you fail to turn on the right prayer on time the sphere deals around 60 damage.

Split region
A fire wall will appear in the centre splitting the two regions, disabling players to move to the other side. If you stand on the line you will receive damage. You cant walk on/through it but if you were standing on this spot you will be pushed to a random side and receive damage, or when you teleport into the area you will receive damage too, similar to the fire walk attack until you move away.
The player who has done the most damage to a boss will receive a drop, this means up to 2 players can receive a drop during a fight with both bosses. The drops will appear after both bosses have been killed. They have a shared collection log and killing either counts for the amount killed in the collection log.
Level advice:
90+ defence
90+ ranged
A high magic lvl, the higher your lvl the bigger the chance you will receive lower damage from their magical attacks.
Gear advice:
As a minimum, full Kyudo or Morrigan's T3/Armadyl (I) will work fine, but you might have a hard time dealing with the mechanics of the boss, as the fight takes longer with this gear. The Twisted bow is the best weapon to use, but a blowpipe will work fine too. If using Kyudo without a Twisted bow, an Armadyl crossbow works best.

Fight overview
The best way to kill these bosses is with 2 strong, well geared players, or 2-4 mediocre geared players. Make sure to have about equal amount of players on each boss to prevent the bosses healing each other. Having more players makes it easier as it increases dps, but only 2 players will receive drops. It is also more challenging to cope with the fire walk attack if there is more players cause there is a bigger chance other players will receive damage when they kill the boss. Key here is to keep players standing in each other during the fire walk attack, but it is not required.
When the areas are split, just keep attacking the other boss and wait till you can move again. During the fight it is not necessary to move a lot.
When the spheres are thrown towards players, the easiest way to track this is to keep an eye on chat, but you only have a few game ticks to react. Keep your mouse close to your protection prayers to be able to react as fast as possible. Try to keep your HP over 75 to reduce the chance of being stacked out if you pray to late.
Once the bosses have done all of their special attacks they will start over doing these. They will do a special attack after they've each done 5 normal magic attacks. If one dies, the other one will also do the mechanics of the other boss. When they've both died, the players who've dealt most damage to each boss receive loot.
Rewards
The bosses have a very unique shared drop table, dropping items such as Divine whip and Lucified whip, which are two very strong, custom whips with equal stats to each other. Combining both of these with the Serpentine whip creates the Ominous whip, the strongest one-handed weapon in the game. They also drop the Holy ancestral kit, which allows you to recolour your imbued ancestral pieces, as well as the Holy and Sanguine ornament kit, which allows you to tweak your Scythe of Vitur, Ghrazi rapier or Sanguinesti staff. They also drop a unique pet, which can be morphed into the other.

2 Comments
Good guide! When you say "Bosses have to stay within a certain threshold of HP of each other. If the difference between their hitpoints becomes to big, they start healing each other.", what exact HP difference do they need to stay under to avoid healing?
In reply to #1
If the difference between their hp is bigger than 200, the one with the lowest hp will be healed up roughly to the amount of hp the other one has.